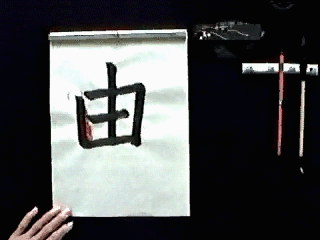
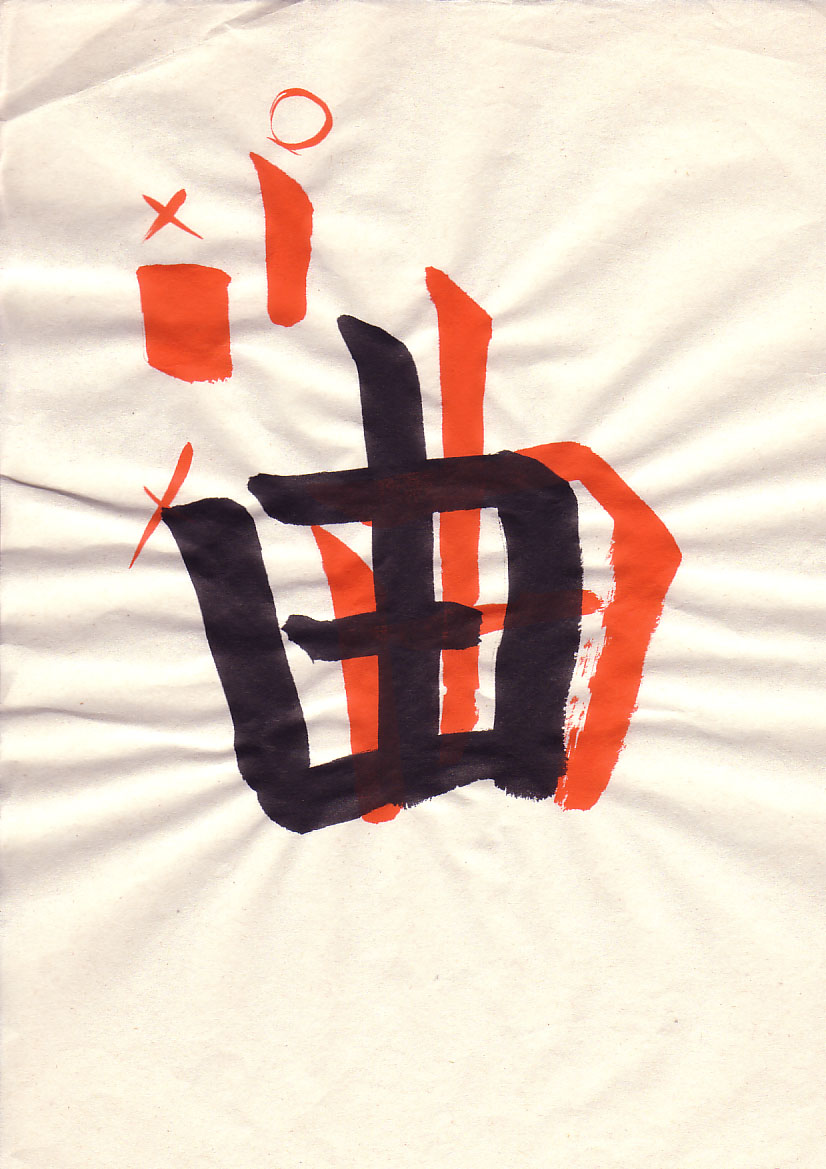
Lesson 6 - Yuu (Reason) 由
In this lesson we revisit tatega, yokoga, and tensetsu. We will focus on the character yuu 由 which means reason. This new kanji combined with ji 自 Self gives us jiyuu 自由 meaning Freedom.
Lesson 6 Vocabulary
| Romaji | Hiragana | Japanese | English |
| ji | じ | 自 | Self |
| jiyuu | じゆう | 自由 | Freedom |
| tatega | たてが | 縦画 | Vertical Stroke |
| tensetsu | てんせつ | 転折 | Continued Lines |
| yokoga | よこが | 横画 | Horizontal Line |
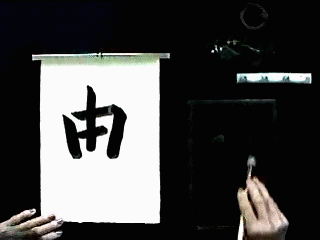
| yuu | ゆう | 由 | Reason |
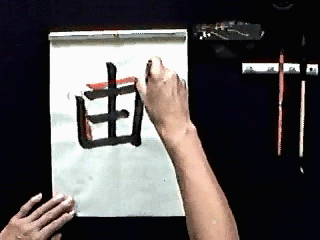
| Introduction Samples | |
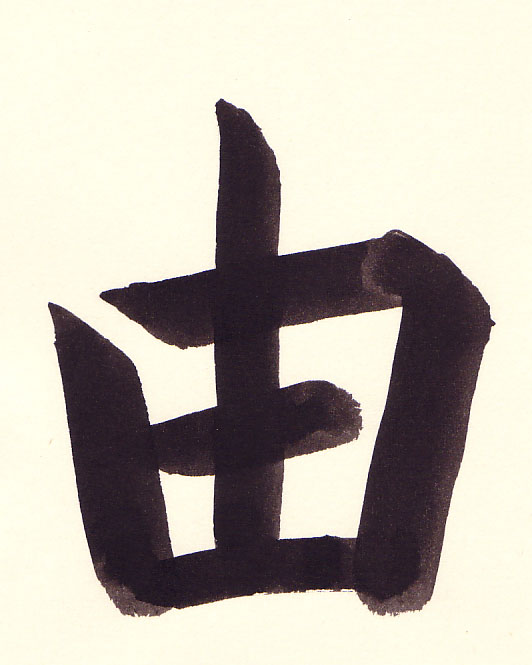 |
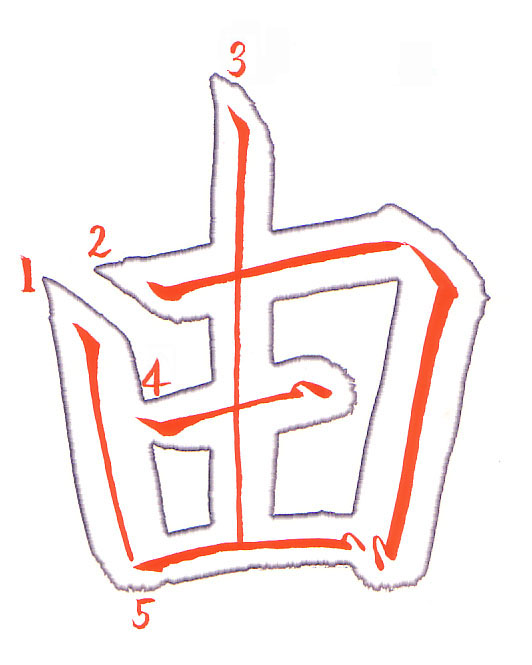 |
| Introduction | Introduction Annotated |
Introduction Sensei Video
End of Section 1: Kaisho Basic
This lesson finishes the first section. Having practiced 3-4 one hour sessions per weeks it should have taken you about three months to master these six lessons. These basics are extremely important and we will continue to emphasize these with new kanji in the next session.
The next session and certification tests may be ordered on-line at Takase Shodokai Catalog
If you feel comfortable that you have mastered these lessons then I urge you to challenge the first certification test. Passing the test will be acknowledged with a certificate and a rank. Otherwise the student will be provided with corrections and guidance for improvement.
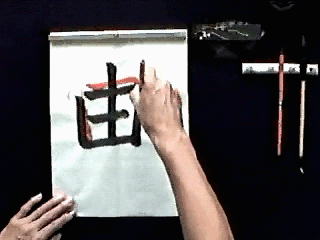
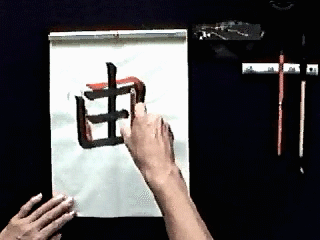
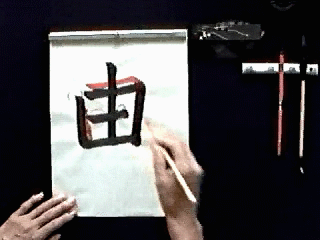
| Introduction Sensei Video - Frame by Frame Analysis | |
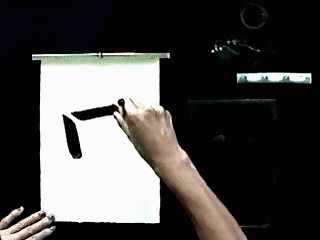
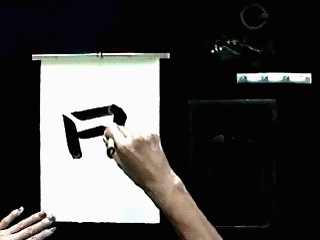
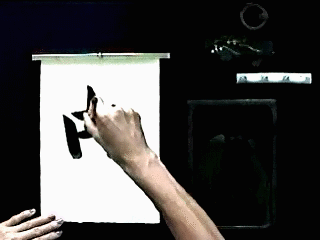
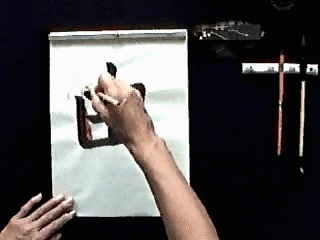
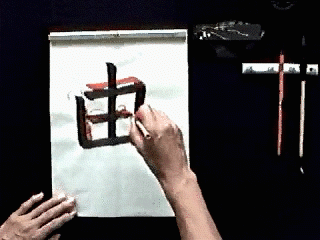
1. Start with the tatega by applying the brush at a 45 degree angle. |

2. Press down gently and then release the pressure a little. When the brush is applied in this manner, the bristles will bend into a C shape. The thick part of this C shape needs to be rotated in the direction of the stroke which in this case is down and slightly to the right. |
3. The line is angled slightly inward but it is straight and has an even width. |
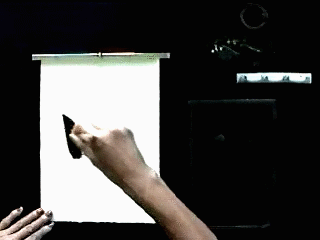
4. To finish the line, the brush is brought up towards the top of the paper and off of the paper. |
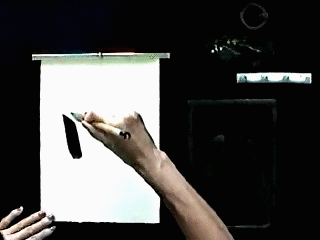
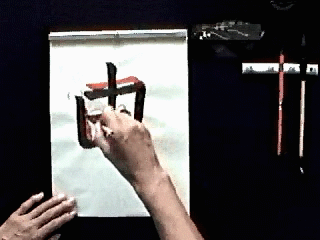
5. Begin the tensetsu by applying the brush at a 45 degree angle. |
6. Then rotate the brush so the thick part is towards the direction of the stroke - in this case it is to the right and slightly upward. |
7. Keep even pressure on the brush and use your entire arm to draw the line. This will give a consistent line width. |
8. Remember the small 45 degree angle line in the corner. |
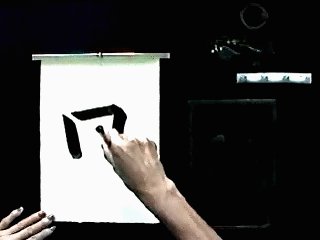
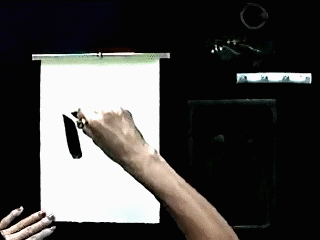
9. The vertical component of the tensetsu is slanted slightly inward, however it is a straight line with an even width. |
10. The vertical component of the tensetsu is slightly longer than the tatega on the left. |

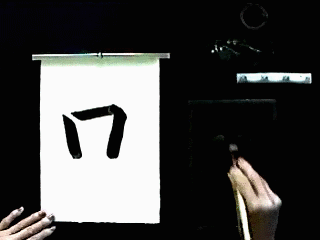
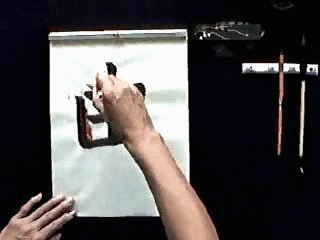
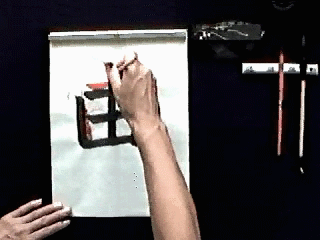
11. Begin the yokoga in the middle of the left tatega. |
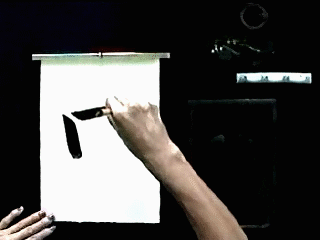
12. Note the change in the hand position. The thick part of the bristles has been repositioned to face the right and slightly upward which is in the direction of the line about to be drawn. |
13. The line is finished with a clean end. |
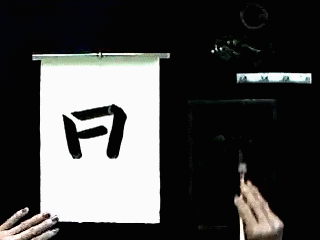
14. This shows the result. Note that the yokoga does not touch the tensetsu on the right. |
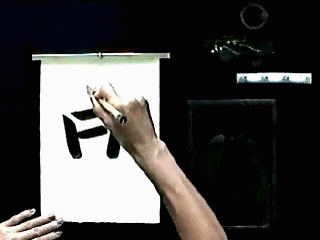
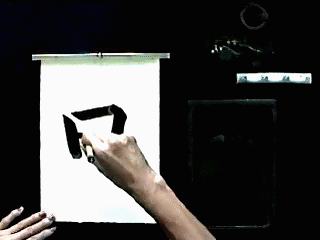
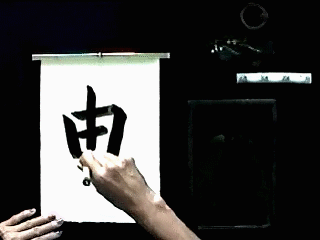
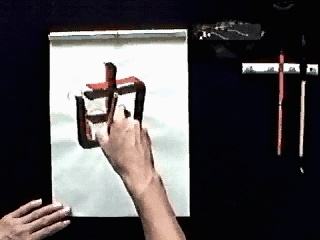
15. Start the center tatega by applying the brush at a 45 degree angle. |
16. There is a slight pushing down of the brush as the hand is moved to reposition the brush so the fat part of the brush faces down towards the bottom of the paper. |
17. Apply even pressure to the brush throughout the stroke and use the entire arm to draw the line. This will give an even line width. |
18. Note the relative lengths of the vertical lines. The rightmost line is slightly longer than the left. |
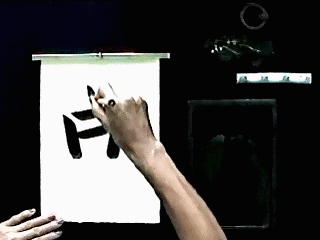
19. Drawn the final yokoga. |
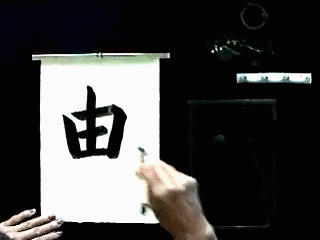
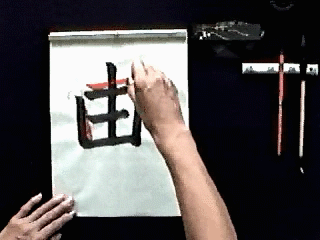
20. Note here again my initial comment about the position of the character being off-center. If you are not seated properly with a good view of the work then this will happen. |
| Introduction Student 1 Video | |
| Introduction Student 1 | Introduction Student 1 Critique |
| Introduction Student 1 - Frame by Frame Analysis | |
1. The left tatega should be slanted inward slightly. |
2. On the tensetsu, the brush was not entered at a 45 degree angle. |
3. Note the rotation of the hand so that the thick end of the brush is towards the right. The tip of the brush is also repositioned to be to the right of the hand. This is almost like one is pushing the brush across the paper. |
4. There is a slight upward slant to horizontal component to the tensetsu. |
5. At the end of the horizontal component, reposition the brush and draw a short 45 degree angle line to give a nice corner. |
6. The brush is repositioned to begin the vertical component. |
7. Note the vertical line is straight and slanted slightly to the left. Be sure to not curve this line. |
8. The central tatega should bisect the yokoga. That is there should be equal lengths on either side of the tatega. |

9. The end of the yokoga does not have a nice form |
10. There should be a mountain on the top of the line and a slight protrude at the lower right corner. |
11. The line is finished bringing the hand back to the left. |
12. Start the tatega with the brush at a 45 degree angle. |
13. The line should be straight with even pressure on the brush giving an even width to the line. |

14. The overall form has lines too thin for the size. We will work on this in the future, but for now concentrate on creating correct lines and strokes. |
| Introduction Student 2 Video | |
| Introduction Student 2 | Introduction Student 2 Critique |
Introduction Student 2 Critique Close-up