Lesson 2 - Lines
Lesson 2 Vocabulary
| Romaji | Hiragana | Japanese | English |
| chuu | ちゅう | 柱 | Pillar Vertical Line |
| fu | ふ | 俯 | Bowed Horizontal Line |
| gakusei | がくせい | 学生 | Student |
| gyou | ぎょう | 仰 | Slanted Horizontal Line |
| hane | はね | 撥ね | Flick Stroke |
| hei | へい | 平 | Flat Horizontal Line |
| ro | ろ | 露 | Dewdrop Vertical Line |
| sensei | せんせい | 先生 | Teacher |
| shin | しん | 針 | Needle Vertical Line |
| tatega | たてが | 縦画 | Vertical Stroke |
| tensetsu | てんせつ | 転折 | Continued Lines |
| yokoga | よこが | 横画 | Horizontal Line |
Lesson 2 - Lines
In this section we are going to cover lines. There are three types of horizontal lines and three types of vertical lines. We will discuss these in detail and then we will then visit continued lines which combine several lines.
Practice Hints
For practice, print out the samples for reference. Clicking on the images will show enlarged samples suitable for use as a model. I encourage you to use Japanese paper for your practice, however, this can be quite expensive. As a substitute newspaper can be used, but this is bad for brushes. If you choose to use newspaper, use your least expensive brush. I suggest you allocate an hour a day at least three days a week for practice. For the first forty-five minutes go over the lesson and pick a particular section to concentrate on. Instead of trying to do every stroke in a practice session, pick a particular stroke and practice until it is just right. In the last ten minutes put away the practice material and what we are going to do is concentrate on doing one's best work. Prepare your space and materials. In a relaxed and centered mental place prepare your ink. Towards the beginning you might want to visualize what you are going to create and visualize the feel of the brush and the paper as your practice the stokes in your mind. As you get towards finishing the ink your mind should be blank and calm. You know what you have to do and this is the time to just do it. Continue to practice in this manner. Concentrate on being calm and focused. The last five minutes of the practice session will be for cleanup and care of the tools. We discussed how each tool should be cared for in the previous lesson and I encourage you to refer to the first lesson until you are confident with their care.
Lesson 2 Vocabulary
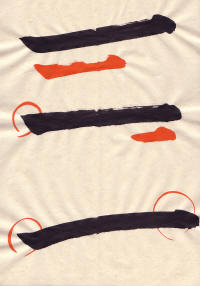
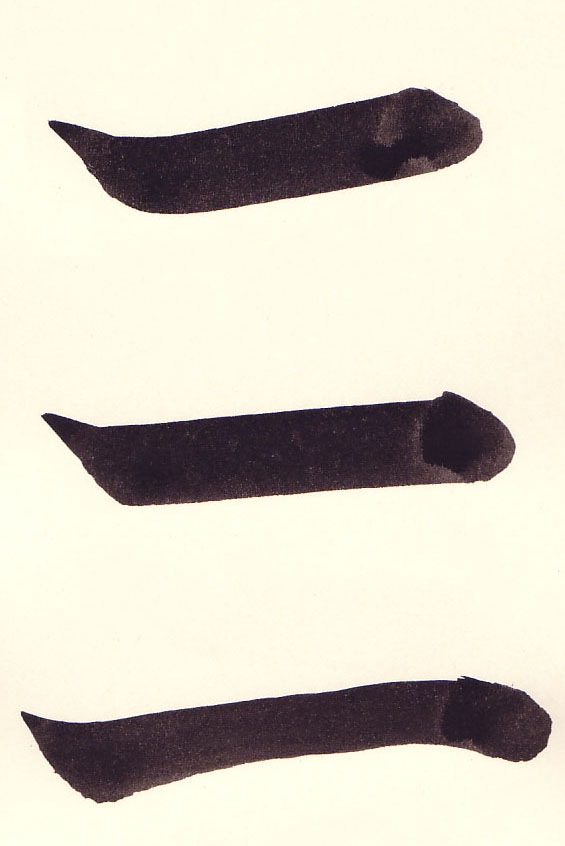
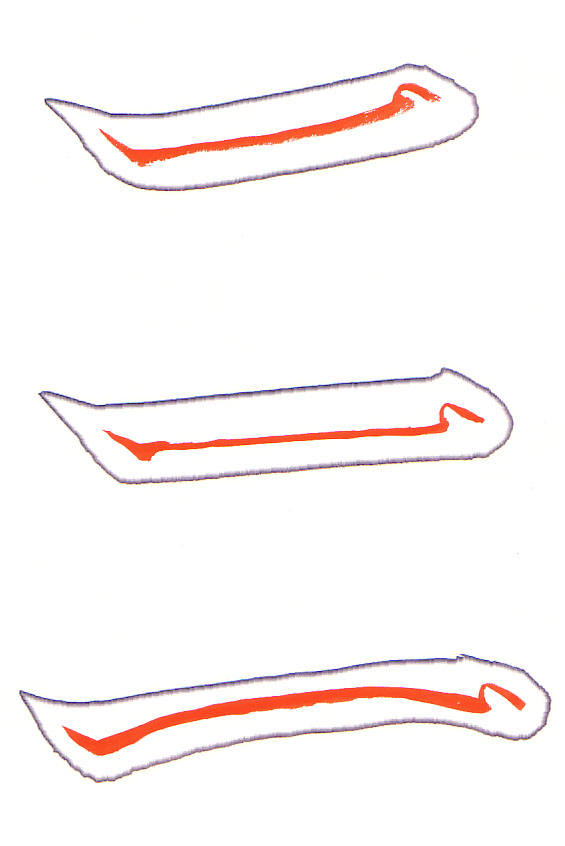
Yokoga (Horizontal Lines) 横画
Yokoga (Horizontal Lines) 横画 Sensei Video Why is the brush applied to the paper at a 45 degree angle? Over and over again we emphasize applying the brush to the paper at a 45 degree angle. The reason being that we want to keep a nice point on the brush throughout the stroke. If the brush is brought straight down or at a steep angle onto the paper then the bristles will split apart and bow outwards. If the brush is applied at a 45 degree angle then the brush maintains its shape throughout the stroke. When the brush is applied at a 45 degree angle, the brush will naturally curve and if handled correctly will maintain its shape throughout the stroke. One will need to rotate and tilt the brush so that the thick part of the curve is facing the direction of the stroke. One can see this rotation in the hand position in the gyou stroke that follows. Each of the above lines begin and end almost exactly the same. The main difference between the three lines is the direction of the line and the pressure on the brush as the line is being drawn. The difference in the ending comes because of the direction the brush is moving before the ending of the line started by the upward (towards the top of the paper) movement of the brush.
Yokoga (Horizontal Lines) 横画 Student 1 Critique Close-up
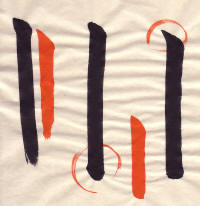
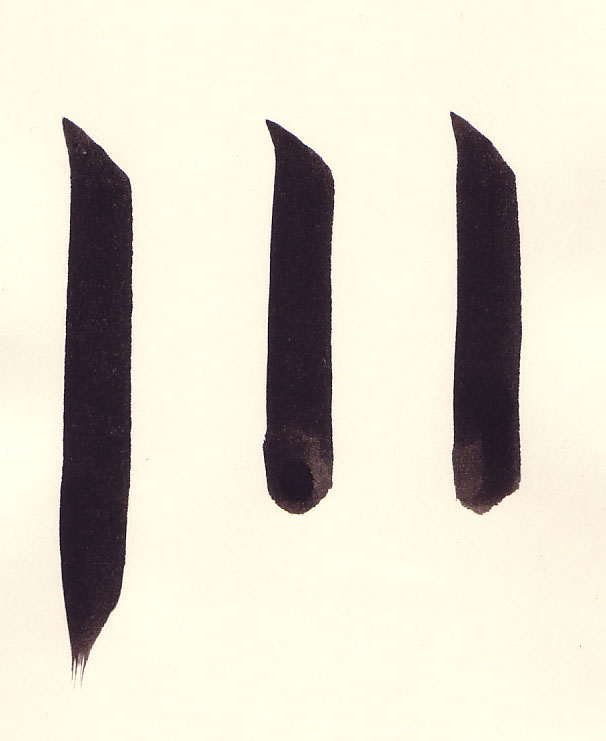
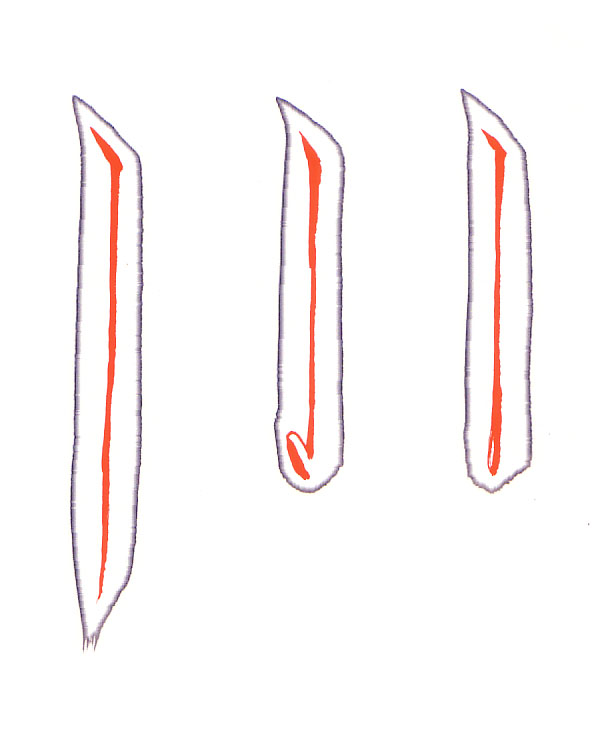
Tatega (Vertical Lines) 縦画
There are three basic vertical lines:

Tatega (Vertical Lines) 縦画 Sensei Video
Tatega (Vertical Lines) 縦画 Student 1 Critique Close-up
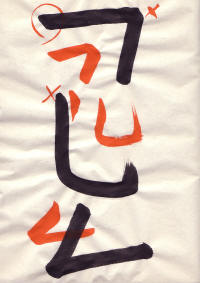
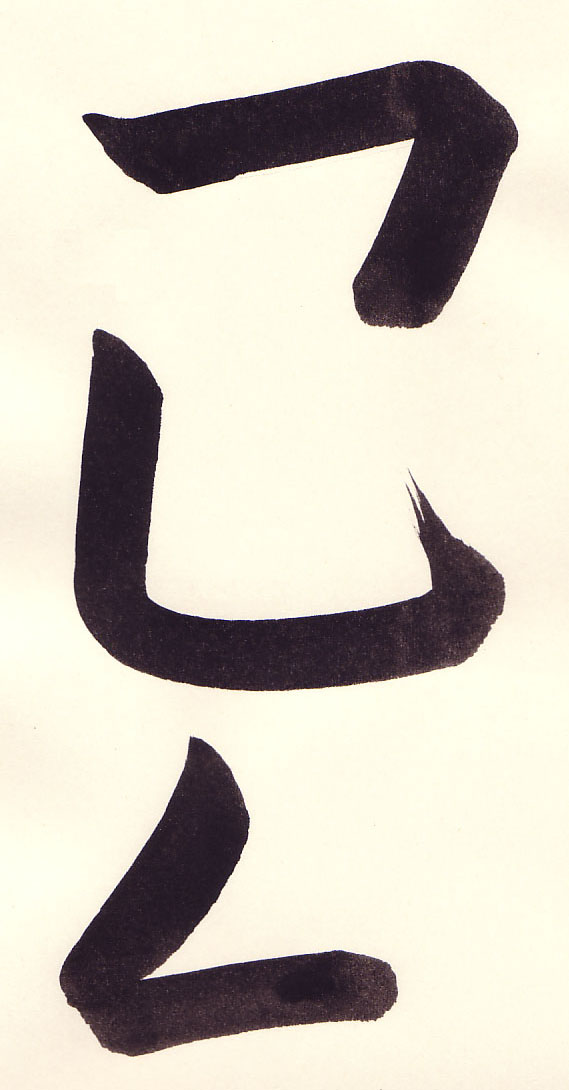
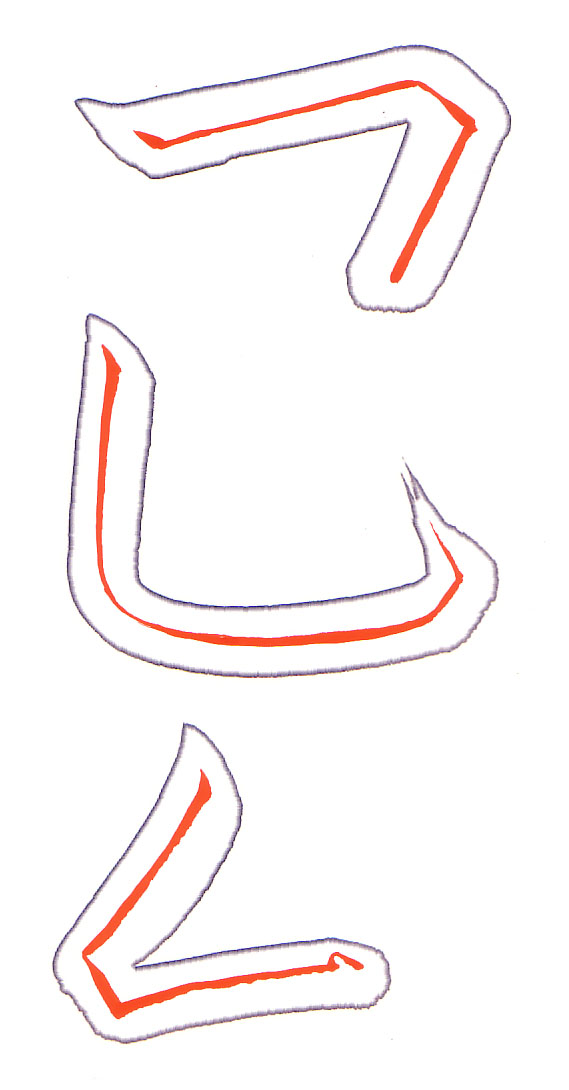
Tensetsu (Continued Lines) 転折
Here we introduce three continued lines called tensetsu (転折):
Tensetsu (Continued Lines) 転折 Sensei Video
Tensetsu (Continued Lines) 転折 Student 1 Critique Close-up
We have covered a lot in these two lessons. The important point is to get used to the tools that you have and to practice, practice, practice.
There is so much more to cover and things get even more interesting in the next lesson where we cover the symbol for Eternity which has the eight basic stroke required for the kaisho font. By mastering these eight strokes one will be able to write many different characters.
Also, don't be too concerned if the lines are not perfect. The objective is to increasingly get better. You will notice that while some of the student samples are not perfect, I do mark as acceptable parts that can still be improved upon. If the student is applying the brush at a 45 degree angle at this point and the entry looks basically correct, then this excellent progress.
And don't be hesitant to return to lessons two and three for further review. Each point should become second nature and it is important to review to make sure you have not picked up a bad habit along the way.
Return to Section 1
Copyright © 2016 Takase Studios, LLC. All Rights Reserved.


Video Demonstrations
Yokoga (Horizontal Lines) — Sensei
Yokoga (Horizontal Lines) — Student 1
Yokoga (Horizontal Lines) — Student 1 Critique
Tatega (Vertical Lines) — Sensei
Tatega (Vertical Lines) — Student 1
Tatega (Vertical Lines) — Student 1 Critique
Tensetsu (Continued Lines) — Sensei
Tensetsu (Continued Lines) — Student 1
Tensetsu (Continued Lines) — Student 1 Critique