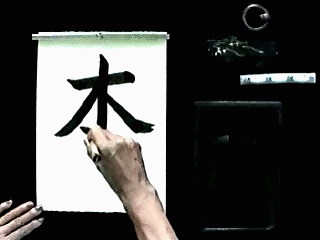
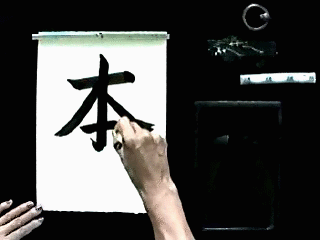
Lesson 4 - Hon (Book) 本
In this lesson we will be practicing with hon which means book. This is a good chance to practice the harai strokes. There is also a nice combination of symmetry and asymmetry that makes this an appealing character.
Hon also means base. Combined with the character for sun 日 which is read as ni or nichi then we have 日本 which is read Nihon and is the Japanese name for Japan. Literally this means the origin or base of the sun.
Lesson 4 Vocabulary
| Romaji | Hiragana | Japanese | English |
| harai | はらい | 払い | Pullout Stroke |
| hidaribarai | ひだりばらい | 左払い | Left Pullout Stroke |
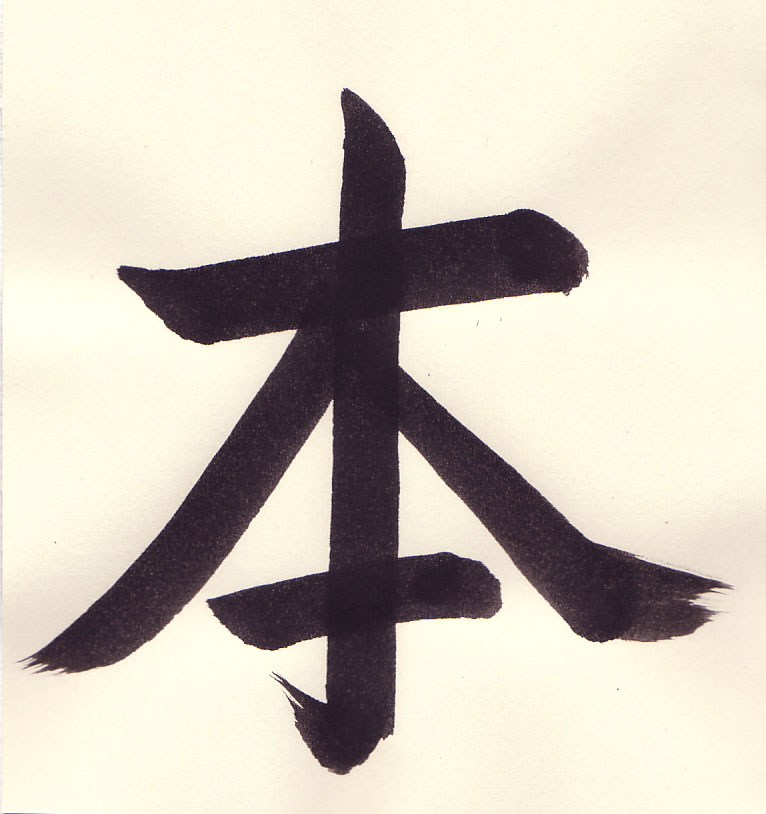
| hon | ほん | 本 | Book |
| migibarai | みぎばらい | 右払い | Right Pullout Stroke |
| tategahane | たてがはね | 縦画撥ね | Vertical Stroke with Flick |
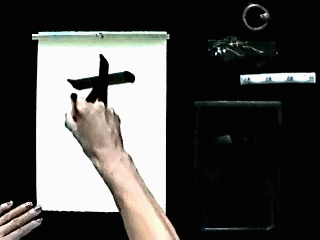
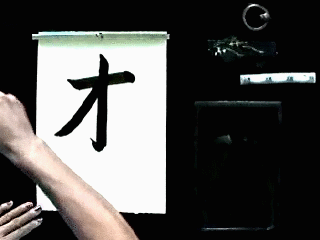
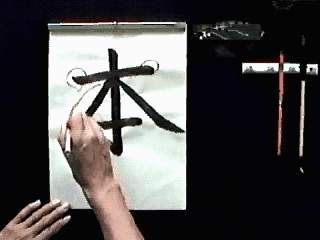
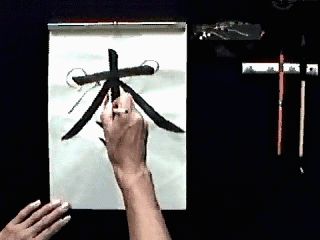
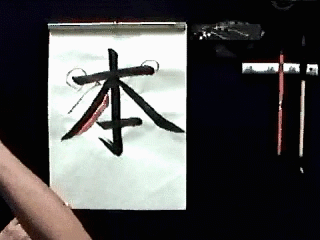
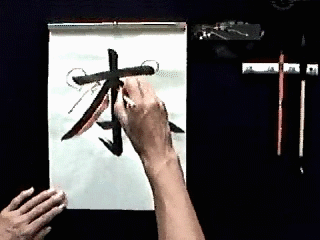
| Introduction Samples | |
 |
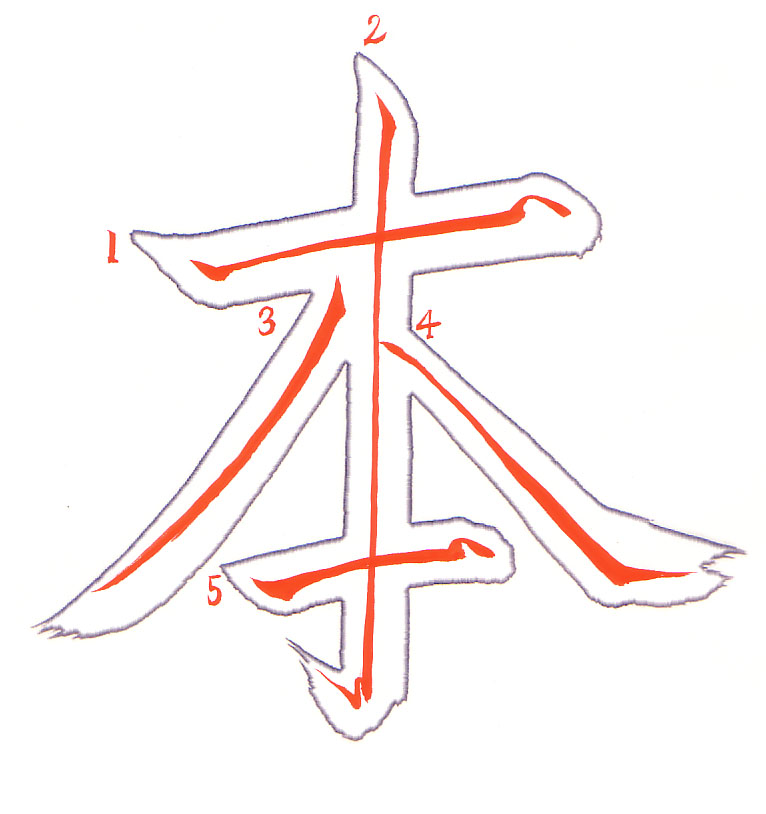 |
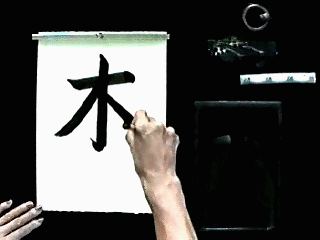
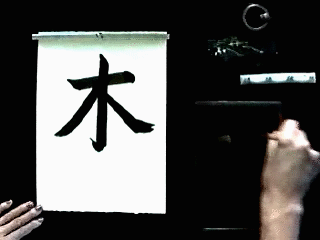
| Introduction | Introduction Annotated |
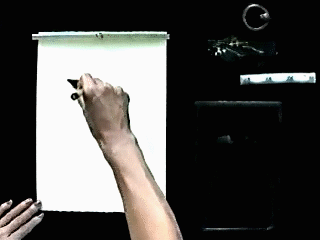
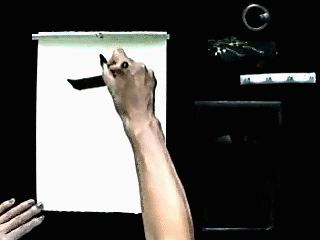
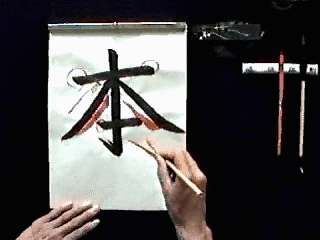
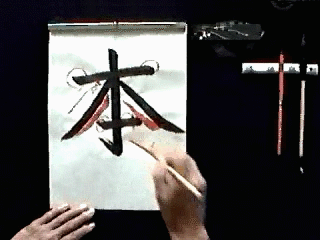
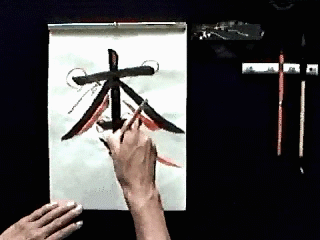
Introduction Sensei Video
There are several mistakes in this student sample. The first is that the student does not use the left hand to hold down the bottom of the paper. The ink is also thin causing a bleeding effect and the student is pressing down hard with an overly loaded brush. The result is a hole in the paper.
To get the right ink consistency there are several options. One is to purchase pre-made ink called bokujuu to get a feel for its consistency. One should not use this all the time but use it as a tool to see one example of sumi ink.
Another option is to grind the ink stick for a while and then draw a few strokes. Continue to grind for a while and trying a few strokes. When the ink does not bleed into the paper and has nice color then you will know about how long you will need to grind the ink to get the right consistency for future sessions.
Preparing the ink is an important part of calligraphy and something that you will need to get good at. We will revisit this topic again in the future.
| Introduction Sensei Video - Frame by Frame Analysis | |

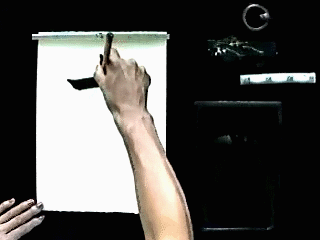
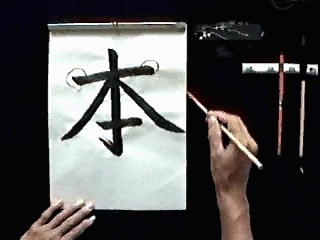
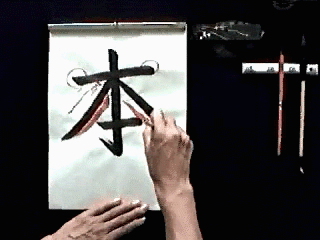
1. The brush is applied at a 45 degree angle. Press down gently on the brush and release the pressure. |
2. Rotate the brush counterclockwise so the thick part of the brush is facing to the right and slightly upward. The brush is tilted so that the tip of the brush is to the right of the end of the brush. Push the brush to the right using the whole arm and even pressure. |

3. Release pressure and lift the brush up (but not off) the paper, rotate the brush about twenty degrees clockwise, and then reapply pressure. Then life the brush up and off the paper. This will give a nice ending to the line. |
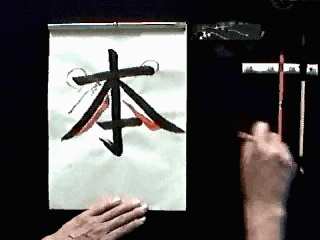
4. For the tategahane, the brush is applied at a 45 degree angle. Press down gently on the brush and come back up a little. |
5. Then the brush is rotated clockwise so the fat part of the brush is towards the bottom of the page. |
6. Then the line can be drawn with even pressure using the entire arm. |
7. At the end of the line, the brush is then rotated slightly clockwise to position the large end of the brush in the direction of a slight 45 degree line. The small line is drawn. |
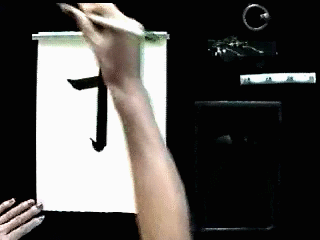
8. Finally in a deliberate hane stroke the tategahane is finished off. |
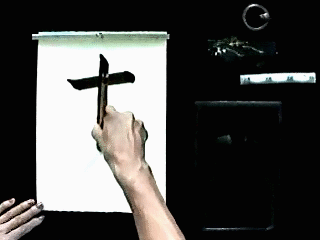
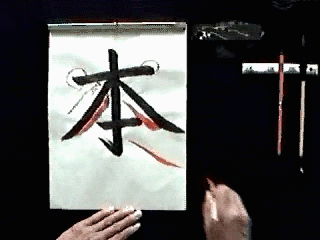
9. The hidaribarai is started in the corner. |
10. The harai strokes are exaggerated and deliberate. |
11. The migibarai is not to be a perfect mirror of the hidaribarai. |

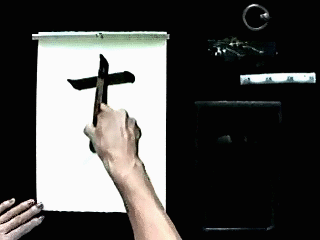
12. At the end of the line pause and rotate the brush so the fat part of the brush is towards the right. |
13. Finish off the with a harai stroke. |
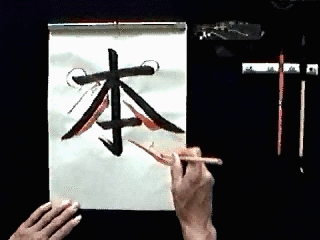
14. For the second yokoga, the brush is applied at a 45 degree angle. Press down gently on the brush and release the pressure. Rotate the brush counterclockwise so the thick part of the brush is facing to the right and slightly upward. The brush is tilted so that the tip of the brush is to the right of the end of the brush. |
15. Push the brush to the right using the whole arm and even pressure. |

16. To end the line, release pressure and lift the brush up (but not off) the paper, rotate the brush forty-five degrees clockwise, and then reapply pressure. Then life the brush up and off the paper. This will give a nice ending to the line. |
| Introduction Student 1 Video | |
| Introduction Student 1 | Introduction Student 1 Critique |
| Introduction Student 1 - Frame by Frame Analysis | |
1. The first yokoga is fine. |
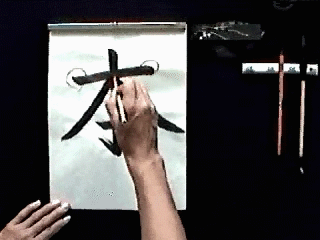
2. The hidaribarai should begin just to the left of the main line. |
3. The hidaribarai is not single uniform motion. |
4. Rather start the line at a 45 degree angle. Press down gently on the brush and come back up. Then rotate the brush so the thick end of the curve is in the direction of the stroke. |
5. |
6. |
7. At the bottom of the migibarai, pause while rotating the brush so the thick end of the curve is facing the right. |
8. Then pull the brush slowly to the right while bringing it off the paper. Notice the large hand movement. |
9. The student did not stop to finish the line, but rather completed the stroke in a single motion |
10. The migibarai is not a single fluid stroke. Rather at the bottom of the line, pause and rotate the brush counterclockwise so the thick part of the brush is facing to the right. Then pull the brush slowly to the right while bringing it off the paper. |
11. The start of the second yokoga is good. |
12. The ending is fine also, but this line should have an equal length on each side of the vertical stroke. The right side here is too long. |
13. The tategahane was finished by doing a flick to the left and up at the bottom of the stroke. The student forgot the slight 45 degree line that should precede the hane stroke. |

14. Once the 45 degree line is finished, the hane stroke completes the line. |
| Introduction Student 2 Video | |
| Introduction Student 2 | |