
Lesson 19
見 ken · See
1. The character
Modern written Japanese is not complex because of the number of kanji characters but rather is complex because of the number of different readings these characters have. There are only about two thousand characters in common use today. The problem is that each character can have several readings depending on the context.
The character we are looking at is 見 which can be read mi(ru) 見る which means "to see" and again as mi as in 見本 which is mihon meaning "sample". It can also be read as ken as in 一見 which is read ikken meaning "glance."
Why the different readings? Japan started adopting the Chinese written language to write Japanese starting from around 500 AD and this effort continued off and on for centuries. In adopting the Chinese writing system, sometimes the Chinese readings were kept and sometimes Japanese readings were used. miru is the Japanese reading and notice that hiragana needs to be added to complete the verb. Chinese does not have these kana. ikken is a reading adopted from a Chinese reading.
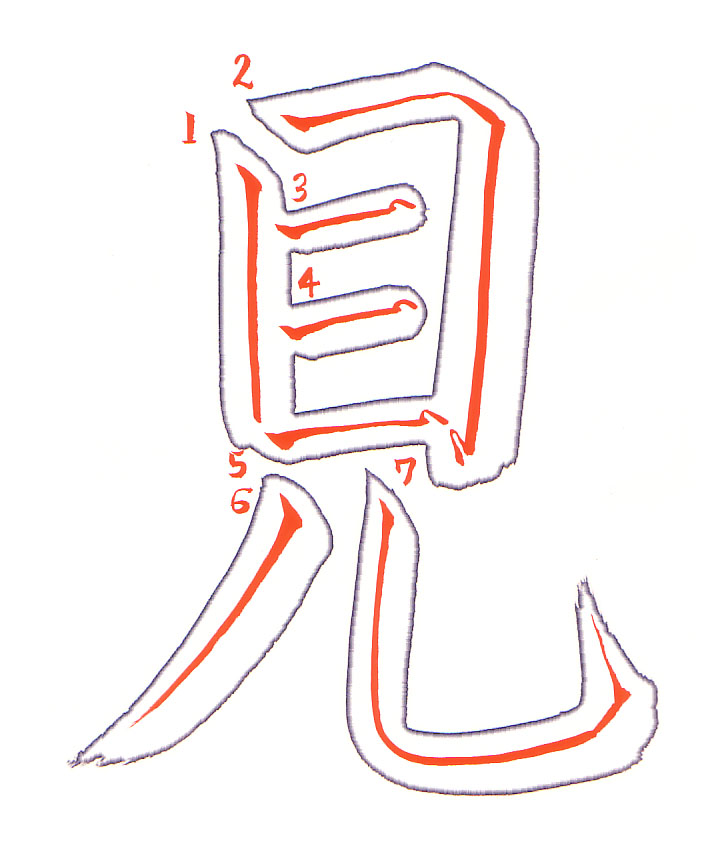
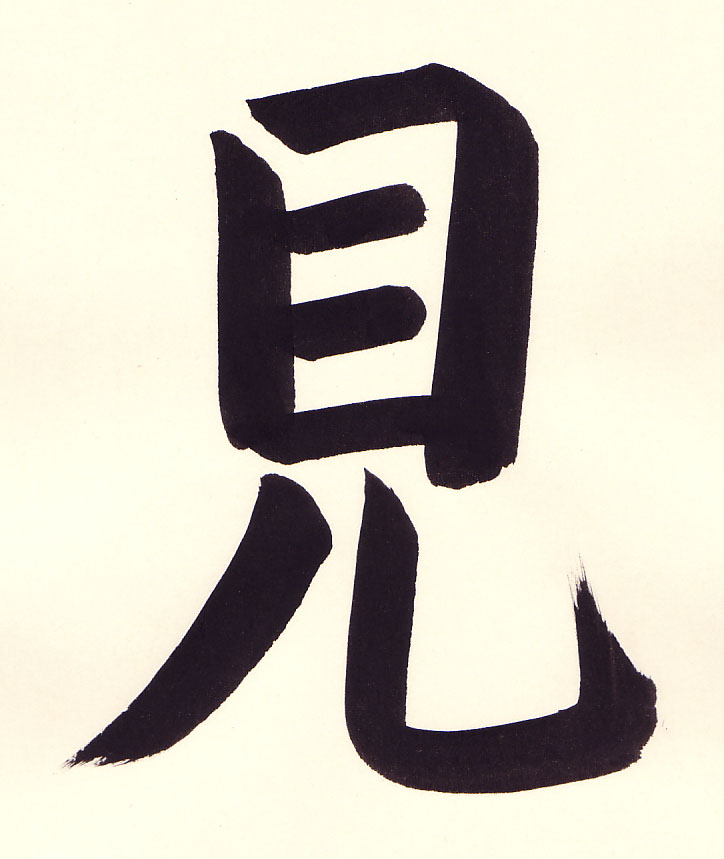
- 0:10 The style of tatega we will use is the ro or dewdrop. Start the line by applying the brush to the paper at a 45 degree angle.
- 0:10 Press down gently on the brush and come back up a little.
- 0:11 The brush is then rotated clockwise so the thick part of the curve of the brush is facing downward. The brush is also tilted so the tip of the brush is well below (towards the bottom of the page) the end of the brush.
- 0:12 Then push the brush straight down using your arm to draw the line.
- 0:13 To end the stroke, the brush is lifted a bit and reapplied very briefly.
- 0:14 Finally the brush is lifted in an upward stroke (towards the top of the paper) and off of the paper. This is performed in a large motion giving the end of the stroke a dewdrop like appearance.
- 0:16 Start the tensetsu line by applying the brush at a 45 degree angle.
- 0:16 Press down gently on the brush and come back up a little.
- 0:17 The brush is then rotated counterclockwise so the thick part of the curve of the brush is facing to the right and slightly upward. The brush is also tilted so the tip of the brush is well to the right of the end of the brush.
- 0:18 Then push the brush to the right using your arm to draw the line.
- 0:18 In the corner the brush is not brought straight down. Rather at the end of the horizontal stroke, the hand is rotated clockwise a bit.
- 0:19 Draw a slight 45 degree angle line to the right and down.
- 0:19 Rotate the hand clockwise again. The vertical component is actually angled slightly to the left.
- 0:20 Use the whole arm to draw the line.
- 0:21 To end the stroke, the brush is lifted a bit ...
- 0:22 ... and reapplied very briefly.
- 0:23 Finally the brush is lifted in an upward stroke (towards the top of the paper) and off of the paper. This is performed in a large motion giving the end of the stroke a dewdrop like appearance.
- 0:29 The two horizontal lines are spaced roughly equidistant however the inner rectangle is slightly smaller than the two outer rectangles.
- 0:35 The horizontal lines are also angled slightly upward.
- 0:41 You may recognize this as the character for eye (me). The bottom part of the character which we are about to add means person changing the meaning from "eye" to "to see".
- 0:44 For the hidaribarai stroke, apply the brush to the paper at a 45 degree angle.
- 0:44 Press down gently on the brush and come back up.
- 0:45 Then rotate the brush so the thick end of the curve is in the direction of the stroke.
- 0:46 Using consistent pressure and using the entire arm to draw the line, bring the brush to the left and down in a nice smooth arc.
- 0:47 As you approach the bottom of the stroke gradually bring the brush off the paper giving a nice taper to the line.
- 0:49 Apply the brush to the paper at a 45 degree angle.
- 0:50 Press down gently on the brush and come back up. Then rotate the hand to position the thick part of the brush to face downward and slightly to the left.
- 0:51 Using consistent pressure and using the entire arm to draw the line.
- 0:52 The brush is rotated again to draw the curve. At the end of the curve, pause briefly and rotate the brush counterclockwise and draw a slight 45 degree angle line up and to the right.
- 0:55 Then in a large hane stroke finish off the line.
2. How students did
A student’s 見
The student’s video, without corrections
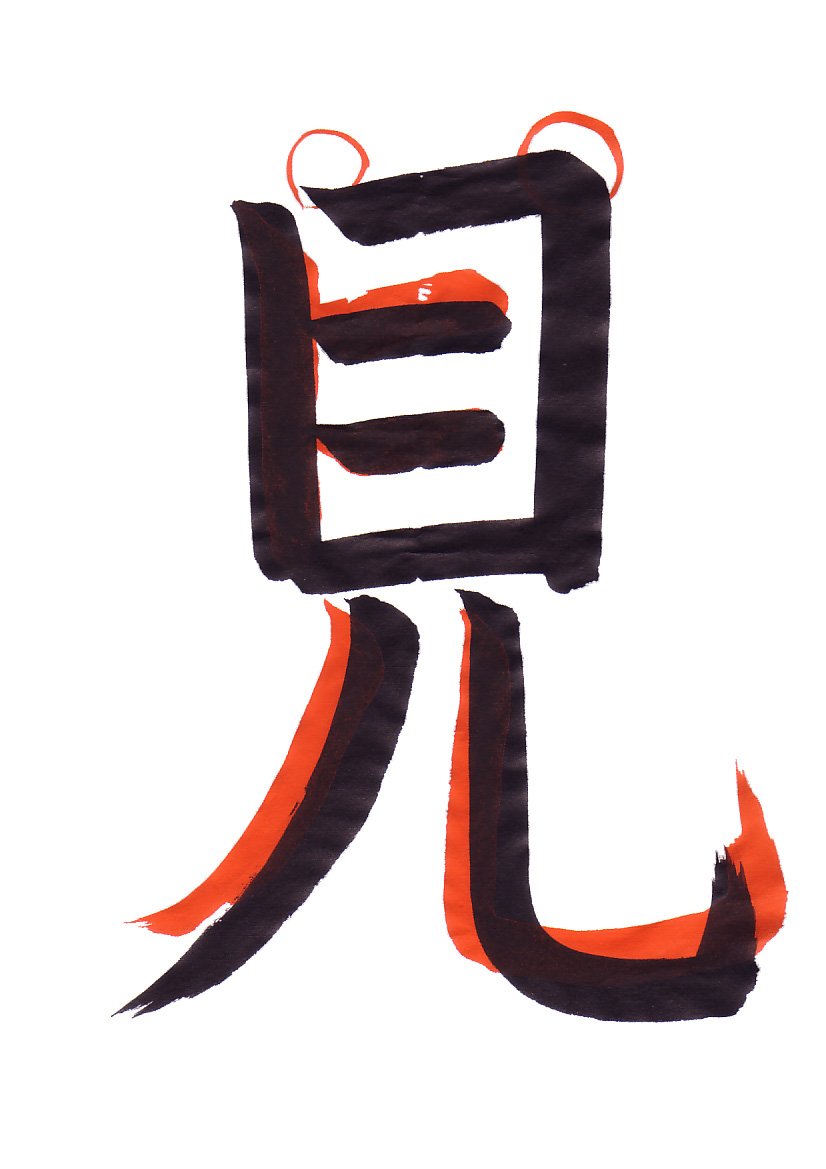
- 0:03 The yokoga does not have a nice tapered start. This is corrected by applying the brush at a 45 degree angle and then pressing down slightly on the brush.
- 0:06 Use the entire arm to draw the line.
- 0:09 The yokoga can also be brought to the right a bit as shown here.
- 0:14 The tensetsu has a nice start and corner.
- 0:18 The first horizontal should angle slightly upward.
- 0:24 The second horizontal line should start in further into the tatega.
- 0:28 The hidaribarai does not have a nice start. Again apply the brush at a 45 degree angle then gently press down on the brush and release the pressure.
- 0:30 Using the arm draw the arc in a large deliberate motion.
- 0:31 This shows how the brush tends to naturally curve and it is to counter this effect that one must often tilt the brush to get correct contact with the paper.
- 0:36 For the size of the character the student's hidaribarai stroke is too long. The bottom part should be shorter than the top part.
- 0:37 The vertical component of the curved line should angle slightly to the left.
- 0:38 The curve should be rather sharp.
- 0:39 The student's line is longer than it should be.
- 0:44 This is looking fairly good.
Another student’s 見
The student’s video, without corrections
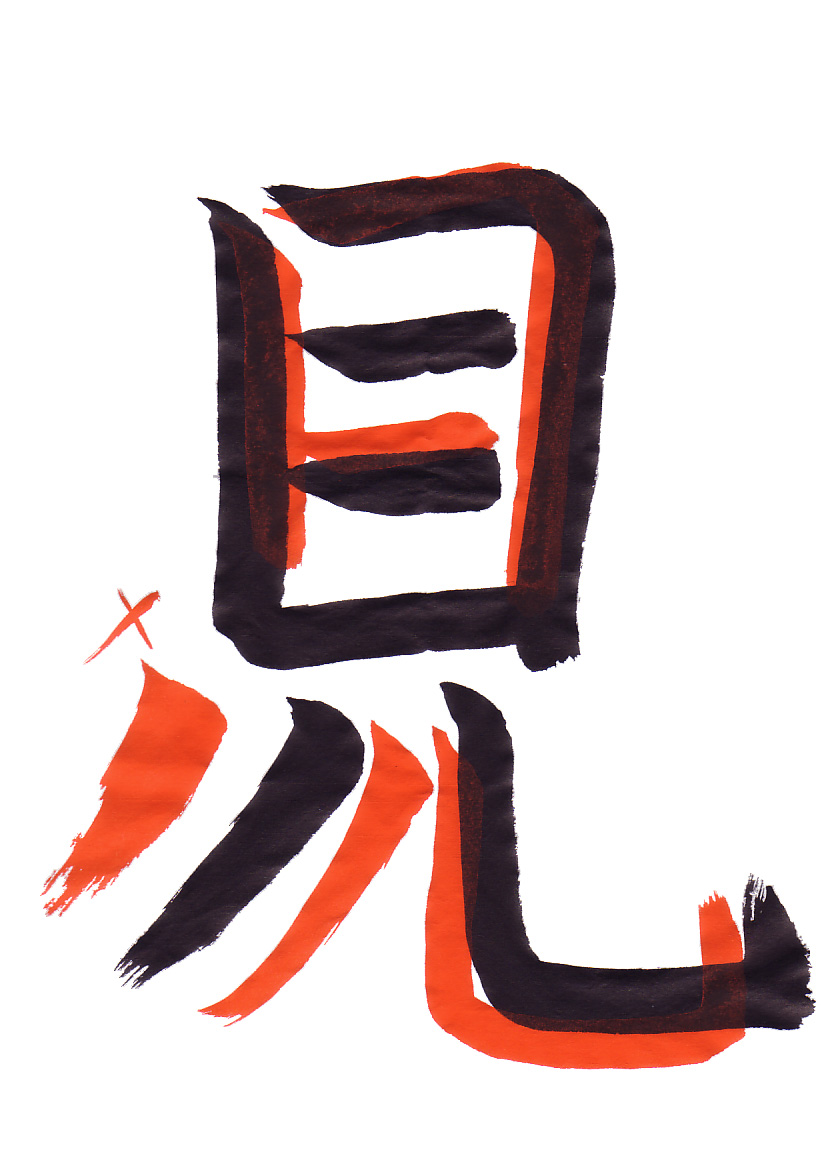
- 0:09 The tatega should be shorter and should either be vertical or angled slightly inward.
- 0:18 The tensetsu should also be suitably shortened. The student should also pay attention to using consistent pressure on the brush and using the entire arm to draw the line. This should result in consistent line width.
- 0:26 With the resized character the second horizontal line should be up further.
- 0:31 The thick part of the brush should be used to draw the hidaribarai.
- 0:36 The student applied the brush at a 45 degree angle, but did not reposition the brush. The result is that the line is drawn with the side of the brush.
- 0:40 Using the side of the brush does not give a nice effect.
- 0:49 For the curved line, the vertical component should angle slightly to the left and the curve should be sharp - not gradual.
- 0:50 At the end of the line, pause briefly rotating the brush counterclockwise and draw a short 45 degree angle line that goes right and up.
- 0:52 Rotate the brush once again so the thick part of the brush is facing upward.
- 0:56 Finish the line with a quick hane stroke.
Vocabulary
| Romaji | Kana | Kanji | English | Audio |
|---|---|---|---|---|
| hane | はね | 撥ね | Flick Stroke | audio |
| hidaribarai | ひだりばらい | 左払い | Left Pullout Stroke | audio |
| ken | けん | 見 | See | audio |
| miru | みる | 見る | See | audio |
| ro | ろ | 露 | Dewdrop Vertical Line | audio |
| tatega | たてが | 縦画 | Vertical Stroke | audio |
| tensetsu | てんせつ | 転折 | Continued Lines | audio |
| yokoga | よこが | 横画 | Horizontal Line | audio |