
Lesson 14
手 te · Hand
1. The character
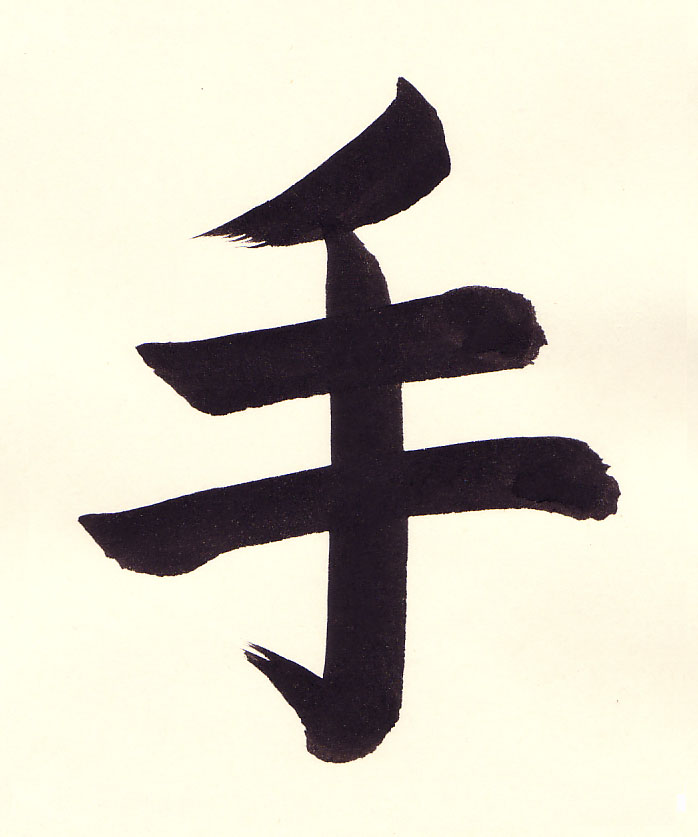
te 手 means hand and is also read shu. The two features we will concentrate on are the hidarihane and the main tategahane stroke. Also be sure that the tategahane stroke is in the middle and cleanly bisects both of the yokoga lines.
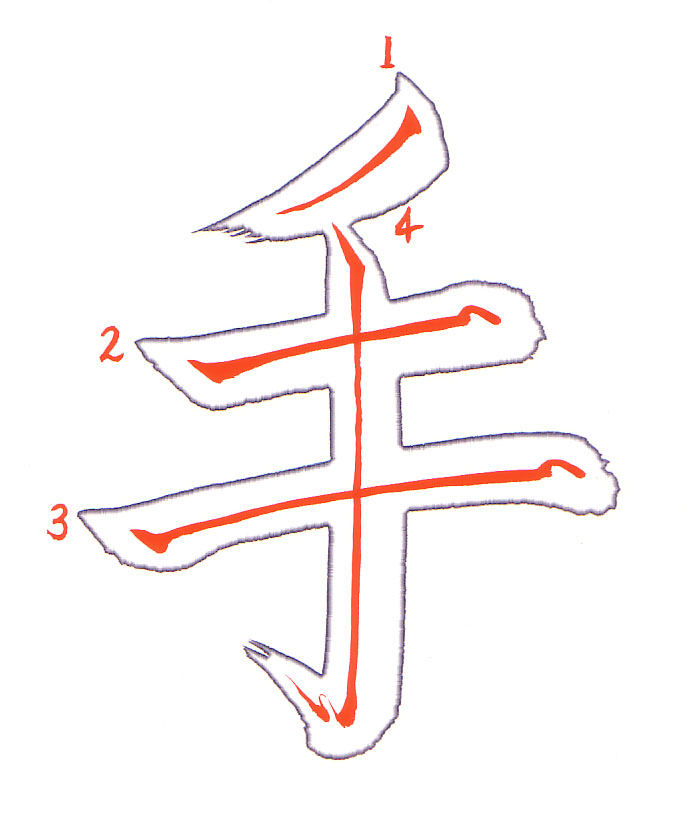
- 0:14 For the hidarihane stroke, apply the brush to the paper at a 45 degree angle.
- 0:14 Press down gently on the brush and come back up a little.
- 0:15 Then rotate the brush clockwise so the thick part of the brush is facing down and to the left.
- 0:16 Tilt the brush so the tip of the brush is to the left and down from the end of the brush.
- 0:16 Then in a quick motion bring the brush to the left and down as you bring the brush off the paper.
- 0:16 This is a large motion stroke.
- 0:21 For the yokoga, apply the brush to the paper at a 45 degree angle.
- 0:21 Press down gently on the brush and release the pressure.
- 0:22 Rotate the brush counterclockwise so the thick part of the brush is facing to the right and slightly upward. The brush is tilted so that the tip of the brush is to the right of the end of the brush.
- 0:22 Push the brush to the right using the whole arm and even pressure.
- 0:24 At the end of the line, raise the brush a bit and then again gently press down on the brush at a slight angle.
- 0:32 For the second yokoga, apply the brush to the paper at a 45 degree angle. This line is slightly longer than the first and it is also slightly convex.
- 0:34 Press down gently on the brush and release the pressure. Rotate the brush counterclockwise so the thick part of the brush is facing to the right and slightly upward. The brush is tilted so that the tip of the brush is to the right of the end of the brush.
- 0:35 Push the brush to the right using the whole arm. Pressure is gradually released towards the middle of the line and then gradually reapplied as one moves past the middle of the line.
- 0:35 At the end of the line, raise the brush a bit and then again gently press down on the brush at a slight angle.
- 0:39 For the tatega, apply the brush to the paper at a 45 degree angle. Press down gently on the brush and come back up.
- 0:41 The brush is then rotated clockwise so the thick part of the curve of the brush is facing downward. The brush is also tilted so the tip of the brush is well below (towards the bottom of the page) the end of the brush.
- 0:42 Then push the brush straight down using your arm to draw the line.
- 0:43 At the bottom of the stroke rotate the brush so the thick part of the brush is facing down and to the left.
- 0:44 Draw a slight 45 degree angle line.
- 0:44 Again rotate the brush so the thick part is now facing to the upper left. Finish the line with a hane stroke to the upper left.
- 0:49 Notice the nice triangular shape of the entire character. There is also an even spacing between the yokoga and note that the tatega nicely divides the yokoga into equal lengths.
2. How students did
A student’s 手
The student’s video, without corrections
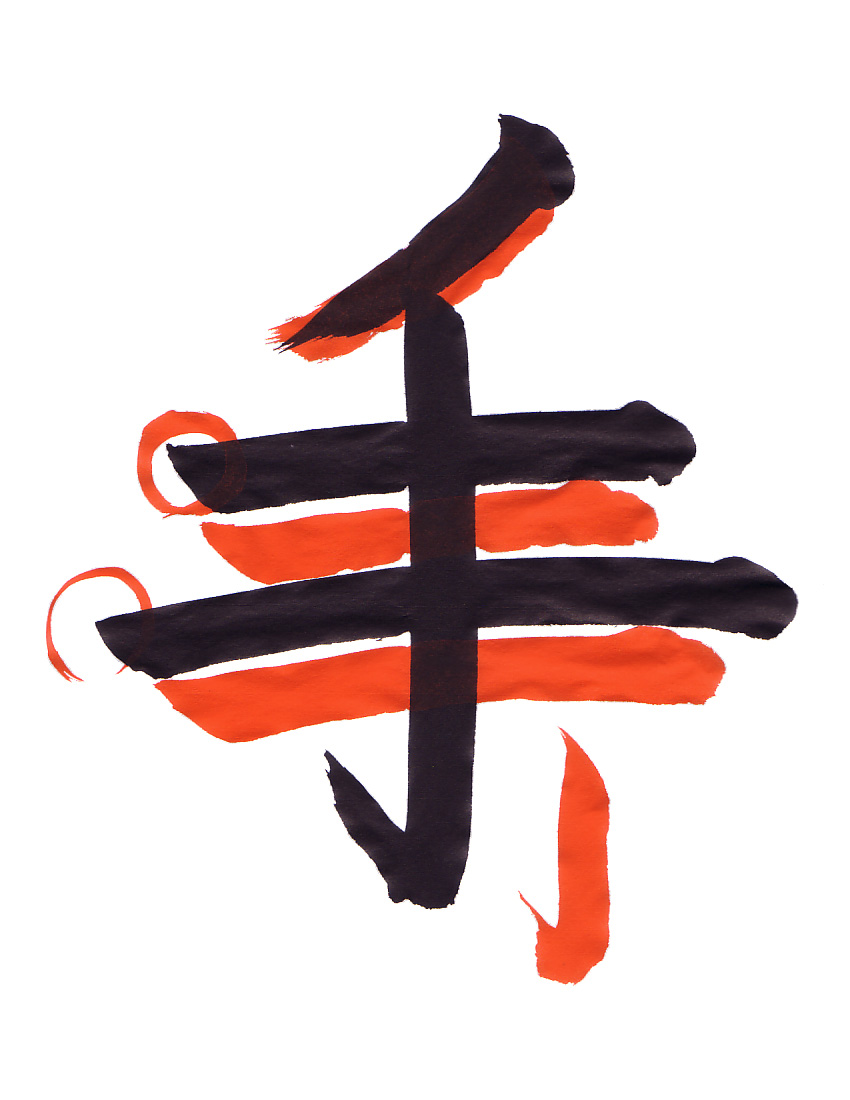
- 0:04 The hidarihane stroke is a little lopsided by being too far to the right of the tategahane.
- 0:07 This makes the hidarihane shorter and more to the left.
- 0:10 The yokoga starts nicely.
- 0:17 For a character this size though, the first yokoga should be shorter.
- 0:18 To end the stroke the brush is lifted upward (towards the top of the paper) and pressure is slightly released. Then the brush is moved to a 45 degree angle and stopped.
- 0:18 This line size is more appropriate.
- 0:22 The second yokoga again starts nicely, but it is also too long.
- 0:25 To end the stroke the brush is lifted upward (towards the top of the paper).
- 0:26 And pressure is slightly released.
- 0:26 Then the brush is moved to a 45 degree angle and stopped.
- 0:33 The tategahane does not have a nice look to the bottom.
- 0:35 At the bottom of the stroke rotate the brush so the thick part of the brush is facing down and to the left.
- 0:36 Draw a slight 45 degree angle line.
- 0:37 Again rotate the brush so the thick part is now facing to the upper left. Finish the line with a hane stroke to the upper left.
Another student’s 手
The student’s video, without corrections
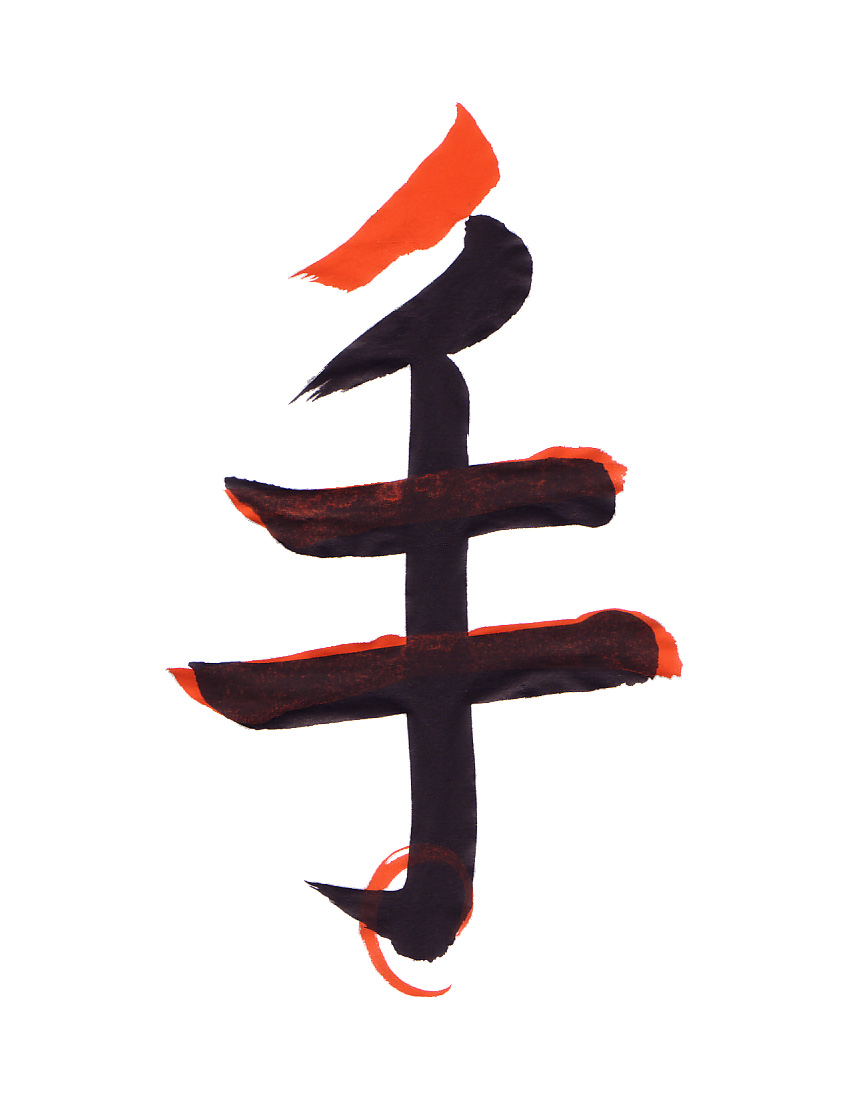
- 0:02 The start of the hidarihane does not look good. Apply the brush to the paper at a 45 degree angle.
- 0:03 Press down gently on the brush and come back up a little.
- 0:04 Then reposition the brush so the thick part of the brush is facing down and to the left. Tilt the brush so the tip of the brush is to the left and down.
- 0:05 Then in a quick motion bring the brush to the left and down while bringing the brush off the paper.
- 0:11 For the height of this character the yokoga should be a little longer.
- 0:16 For the height of this character the second yokoga should also be a little longer. Also this second yokoga should be slightly convex.
- 0:23 The end of the tategahane stroke is fine.
- 0:23 With a little work on the basic strokes this will look much nicer.
Vocabulary
| Romaji | Kana | Kanji | English | Audio |
|---|---|---|---|---|
| hidarihane | ひだりはね | 左撥ね | Left Flick Stroke | audio |
| tategahane | たてがはね | 縦画撥ね | Vertical Stroke with Flick | audio |
| te | て | 手 | Hand | audio |
| yokoga | よこが | 横画 | Horizontal Line | audio |