
Lesson 13
耳 mimi · Ear
1. The character
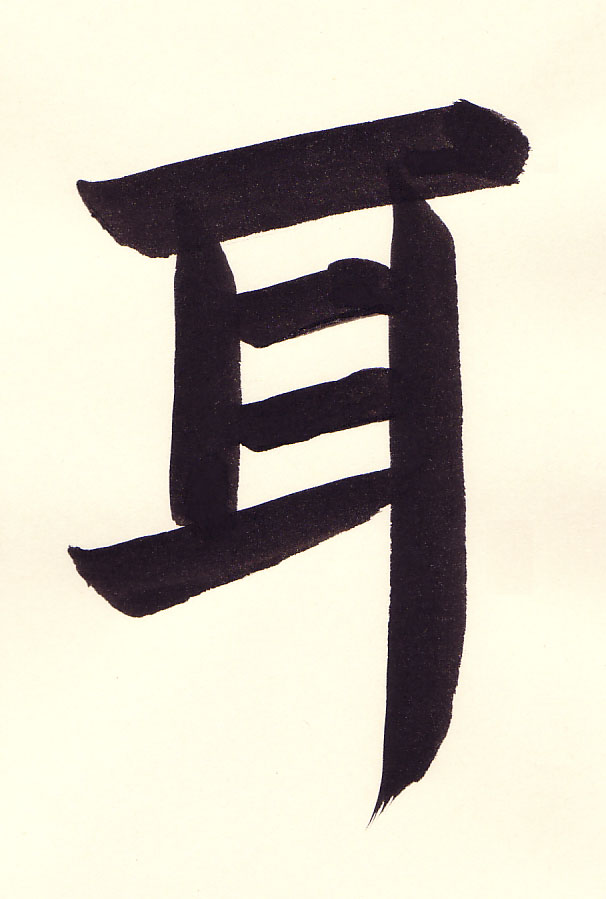
The Japanese reading of 耳 is mimi and most commonly means ear but also means edge. In contrast to the other box-like designs we have worked with this one has a large shin stroke on the right.
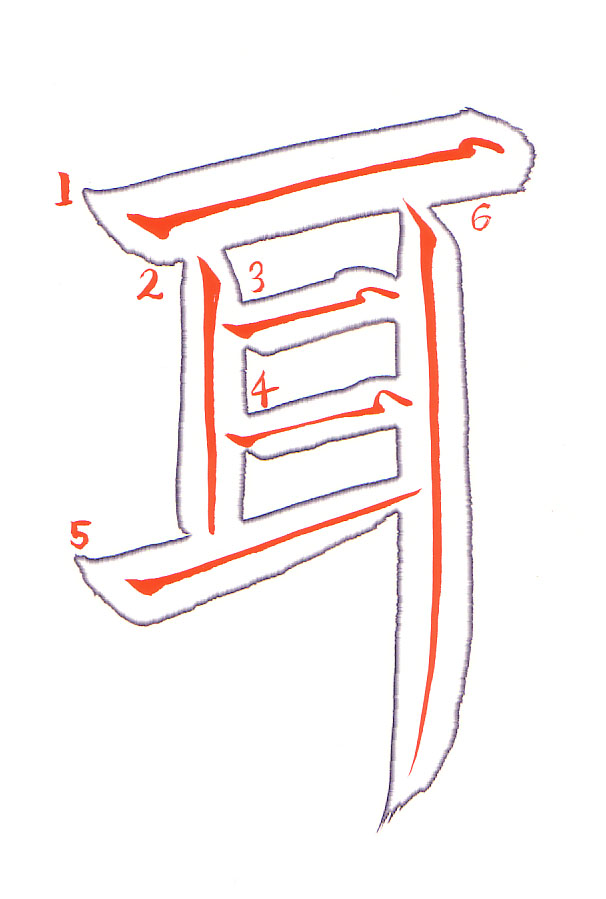
- 0:02 For the yokoga, apply the brush to the paper at a 45 degree angle.
- 0:03 Press down gently on the brush and release the pressure. Rotate the brush counterclockwise so the thick part of the brush is facing to the right and slightly upward.
- 0:04 The brush is tilted so that the tip of the brush is to the right of the end of the brush. Push the brush to the right using the whole arm and even pressure.
- 0:05 At the end of the line, raise the brush a bit and then again gently press down on the brush at a slight angle.
- 0:09 For the ro style tatega, apply the brush in the middle of the yokoga to the paper at a 45 degree angle. Press down gently on the brush and come back up.
- 0:11 The brush is then rotated clockwise so the thick part of the curve of the brush is facing downward. The brush is also tilted so the tip of the brush is well below (towards the bottom of the page) the end of the brush.
- 0:13 Then push the brush straight down using your arm to draw the line. To end the stroke, the brush is lifted a bit and reapplied very briefly.
- 0:14 Finally the brush is lifted in an upward stroke (towards the top of the paper) and off of the paper. This is performed in a large motion. This motion gives the end of the stroke a dewdrop like appearance.
- 0:16 For the yokoga, the line is started by applying the brush to the paper at a 45 degree angle. Note the stroke starts within the tatega.
- 0:18 Proceed as with the other yokoga, note that this is parallel to the first line.
- 0:19 To end the stroke the brush is lifted upward (towards the top of the paper) and pressure is slightly released. Then the brush is moved to a 45 degree angle and stopped.
- 0:24 The space between the second and third line should be the same. The lines should also be parallel.
- 0:25 Start the migihane just to the left of the left-edge of the yokoga. Apply the brush to the paper at a 45 degree angle. Press down gently on the brush and come back up.
- 0:26 The brush is then rotated so that the thick end of the bend of the bristles is facing to the right and up. The brush is also tilted to the left so the tip of the brush is ahead of the end of the brush.
- 0:26 Then in a quick motion bring the brush up and to the right and off the paper.
- 0:27 This is a large motion and almost seems exaggerated.
- 0:30 For the shin style tatega, apply the brush to the paper at a 45 degree angle.
- 0:32 Press down gently on the brush and come back up. The brush is then rotated clockwise so the thick part of the curve of the brush is facing downward. The brush is also tilted so the tip of the brush is well below (towards the bottom of the page) the end of the brush.
- 0:32 Then push the brush straight down using your arm to draw the line.
- 0:34 At the bottom of the stroke the brush is gradually raised off the paper in a long smooth stroke.
- 0:35 This is a large motion and almost seems exaggerated but this motion is crucial to a nice tapered edge.
- 0:38 This is nicely balanced.
2. How students did
A student’s 耳
The student’s video, without corrections
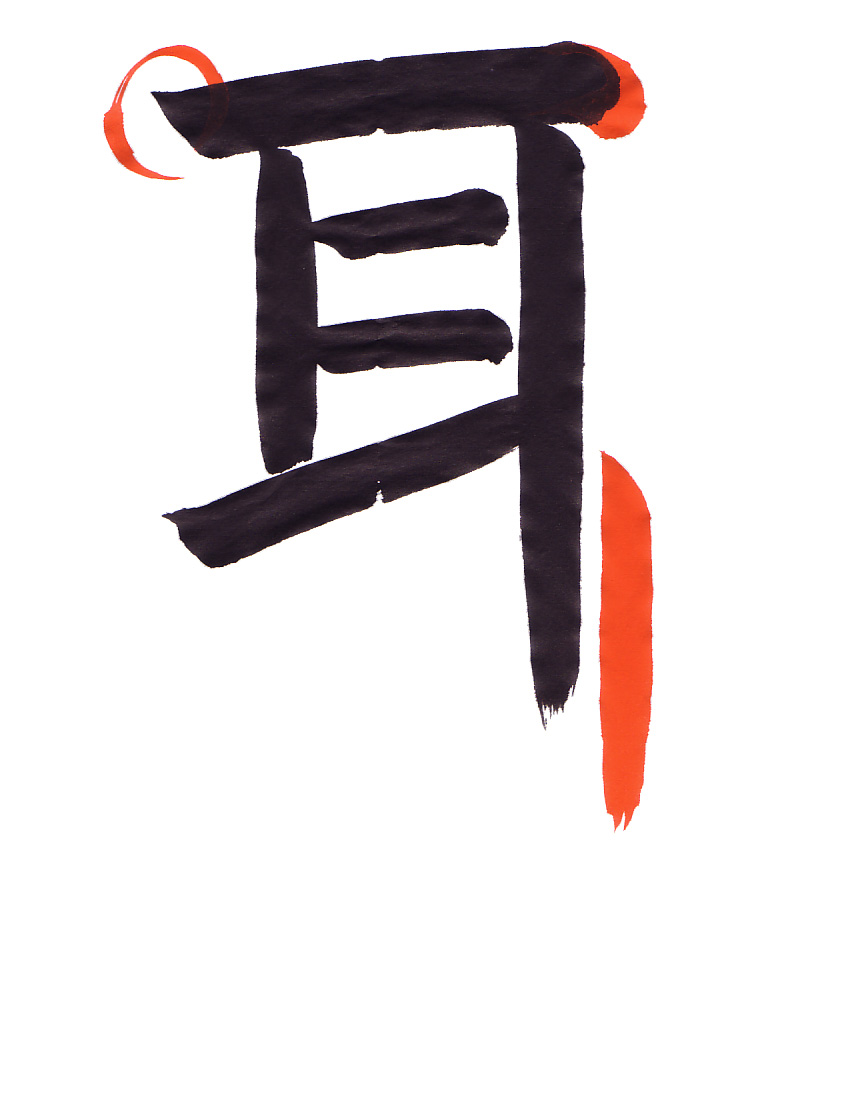
- 0:02 The start of the yokoga is fine.
- 0:12 The end of the yokoga should be extended to the right a bit more. The right part of the yokoga should extend out the same amount as the left part.
- 0:25 The end of the shin should come to a taper without the kasure effect here.
- 0:26 The character is not well centered and the yokoga are not parallel and are not angled slightly upward. Though overall the character is pretty good.
Another student’s 耳
The student’s video, without corrections
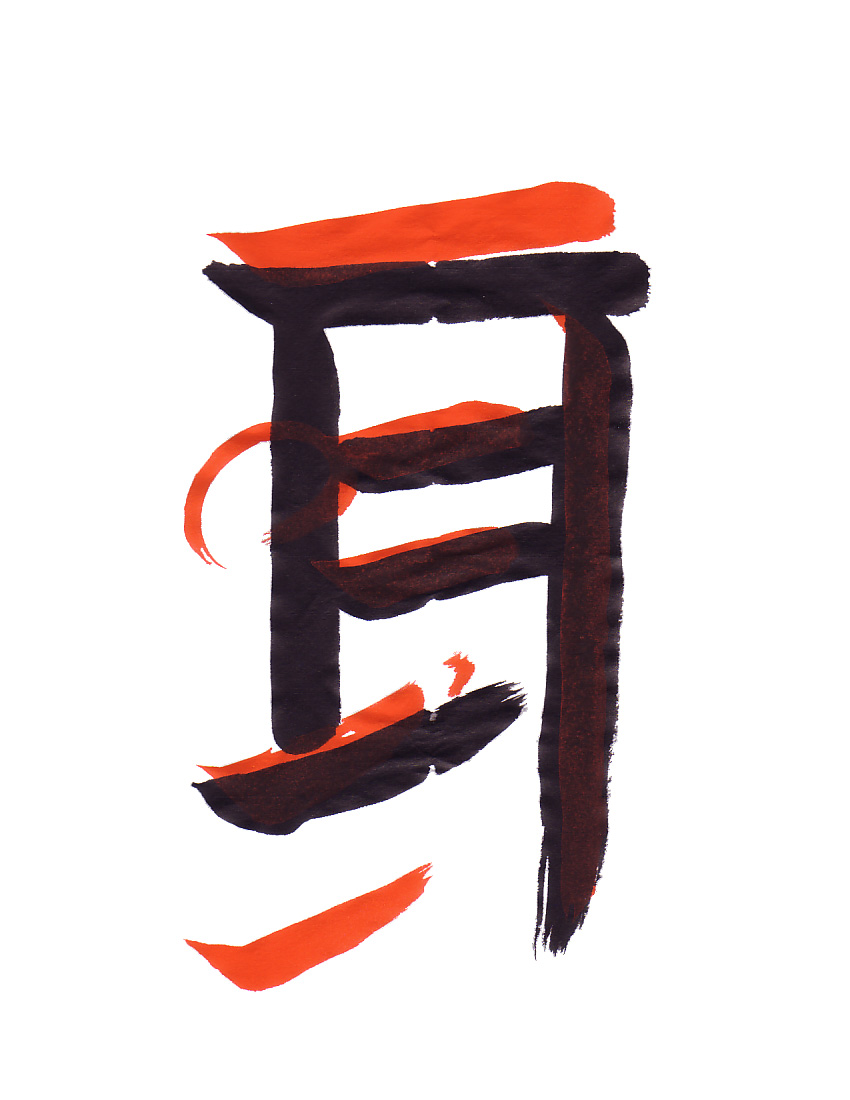
- 0:06 The yokoga is basically fine except that it should be angled slightly upward.
- 0:09 The tatega is fine and has a nice width.
- 0:14 The yokoga should be angled slightly upward and should not touch the tatega on the right.
- 0:16 The same is true for the third yokoga.
- 0:21 The migihane is angled upward more than the other yokoga. Also the taper should come to a point and not have a kasure effect as the student did here.
- 0:24 For the migihane, apply the brush to the paper at a 45 degree angle.
- 0:24 Press down slightly on the brush and release.
- 0:25 The brush is then rotated so that the thick end of the bend of the bristles is facing to the right and up. The brush is also tilted to the left so the tip of the brush is ahead of the end of the brush.
- 0:26 Then in a quick motion bring the brush up and to the right and off the paper.
- 0:27 Again this is a large and quick motion.
- 0:32 The student's line is angled inward and this should not be done with this stroke. The shin is a needle that comes straight down the page.
- 0:39 Overall the character should be positioned higher on the page. The yokoga should all be parallel and should be angled slightly upward.
Vocabulary
| Romaji | Kana | Kanji | English | Audio |
|---|---|---|---|---|
| migihane | みぎはね | 右撥ね | Right Flick Stroke | audio |
| mimi | みみ | 耳 | Ear | audio |
| shin | しん | 針 | Needle Vertical Line | audio |
| tatega | たてが | 縦画 | Vertical Stroke | audio |
| yokoga | よこが | 横画 | Horizontal Line | audio |