
Lesson 12
目 me · Eye
1. The character
In this section we have been practicing the harai and hane strokes in most of the characters. For this final lesson we are going to use me which is all tatega, yokoga and tensetsu.
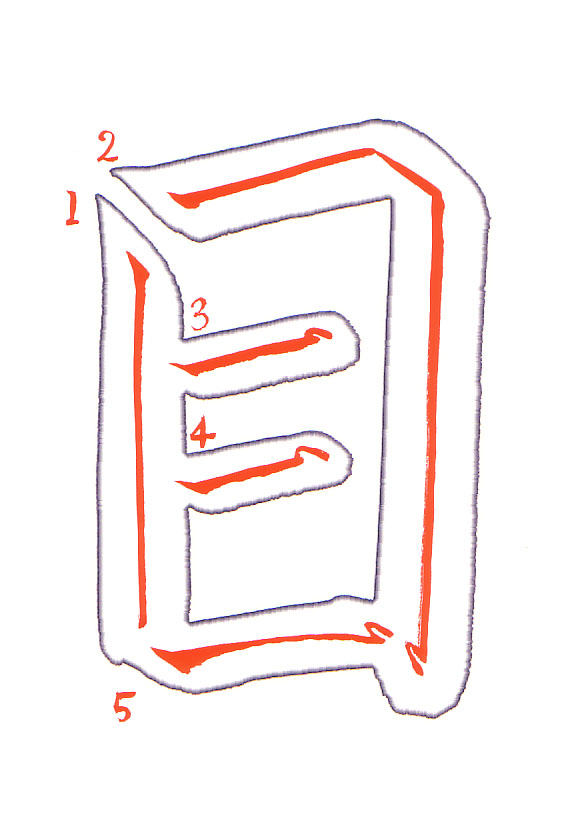
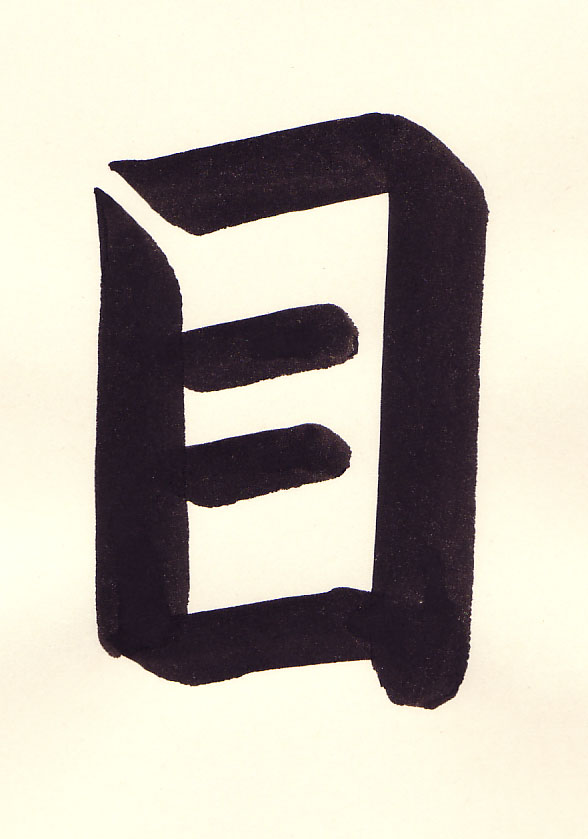
- 0:03 Begin with a tatega called ro 露 Dewdrop. Start the line by applying the brush at a 45 degree angle.
- 0:04 Press down very gently and then release some of the pressure.
- 0:05 Rotate the brush slightly in a clockwise manner to bring the thick part of the brush facing the bottom of the page and slightly towards the right.
- 0:06 Note the brush is also tilted bringing the tip of the brush well towards the bottom of the page as compared to the end of the brush which is towards the top of the page. This allows maximum contact between the thickest part of the brush and the paper.
- 0:08 To end the stroke, the brush is lifted a bit and reapplied very briefly and then lifted up towards the top of the paper and off the paper. Note that the hand position has not changed since the last frame, the entire arm is being used to draw the line.
- 0:10 This looks nice.
- 0:13 Begin the tensetsu by applying the brush at a 45 degree angle.
- 0:14 The hand is adjusted to bring the thick part of the brush to face to the right and slightly upward.
- 0:16 At the end of the line pause briefly to adjust the brush so the thick part of the brush is facing down and to the right. Note again how the brush is also tilted bringing the tip of the brush well towards the right as compared to the end of the brush which is towards the left.
- 0:16 Draw a very slight 45 degree angle line down and to the right.
- 0:18 Now reposition the brush to begin the vertical component by rotating the brush clockwise so the thick part of the curve of the brush is facing towards the bottom of the page and very slightly to the left.
- 0:20 To finish the stroke the brush is brought up towards the top of the paper and off the paper.
- 0:24 Note the nice corner and that the right vertical line is just a bit longer than the left.
- 0:29 Begin the horizontal line in the middle of the vertical line on the left.
- 0:31 At the end of the line the brush is brought back to the left ...
- 0:33 And off the paper.
- 0:35 The third horizontal line is closer to the second line than the second line is to the first.
- 0:39 Now draw the fourth horizontal line so that it has the same distance as the second line has to the first.
- 0:41 Start slightly below and in the middle of the vertical line on the left.
- 0:49 And finish the yokoga leaving the right vertical line sticking out a bit.
2. How students did
A student’s 目
The student’s video, without corrections
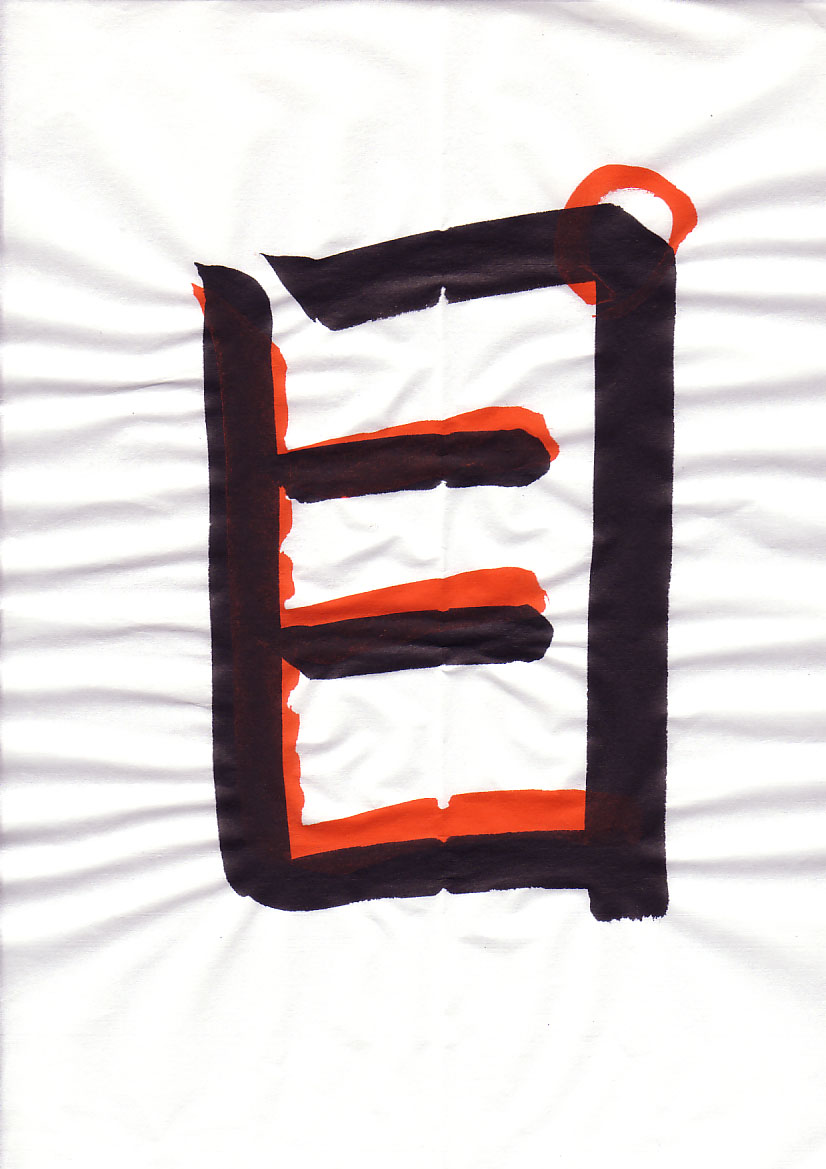
- 0:05 The start of the tatega should be more defined and tapered.
- 0:09 The left vertical line should be slanted inward very slightly.
- 0:12 The corner is fine.
- 0:21 The yokoga should angle slightly upward.
- 0:24 This second yokoga should also angle slightly upward.
- 0:27 There is too much space between the third and fourth line. Bring the fourth line up a bit. The lines divide the space into three rectangles. The height of the top and bottom rectangle should be the same and they should be larger than the middle rectangle.
Another student’s 目
The student’s video, without corrections
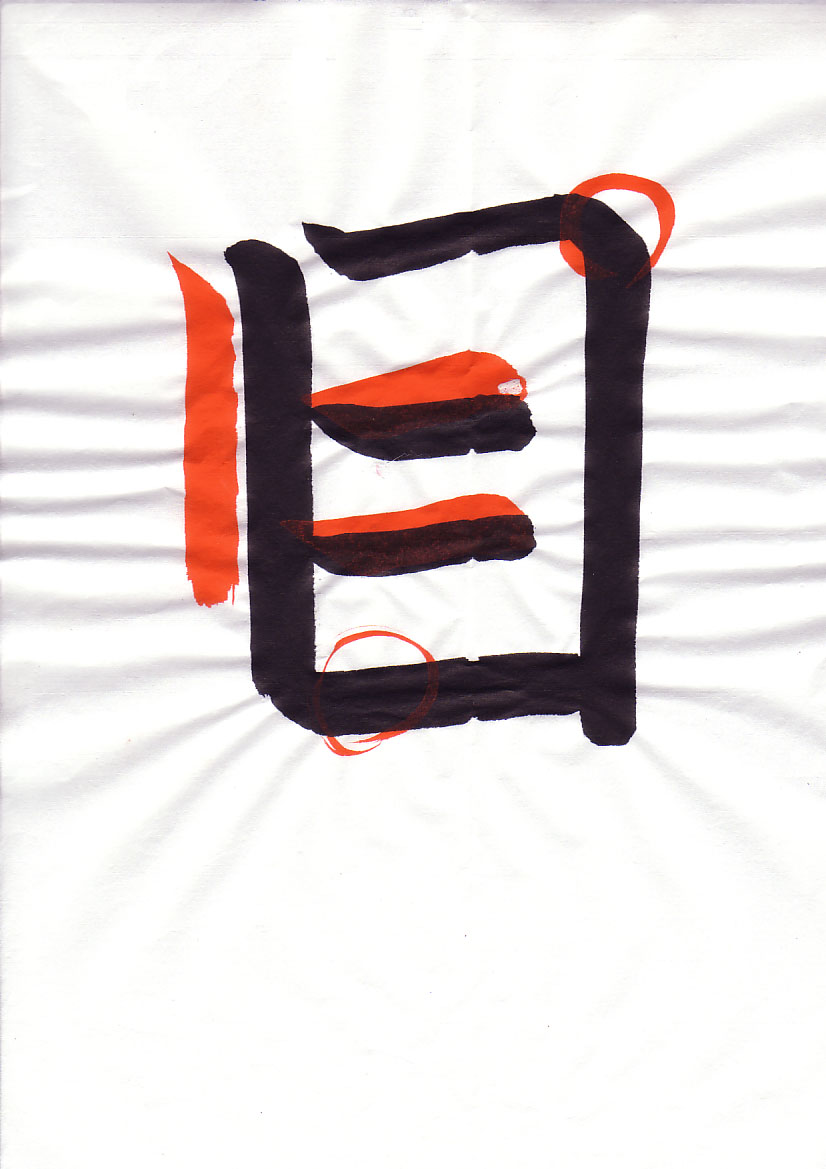
- 0:02 The start of the tatega should be more defined and tapered. Begin by applying the brush at a 45 degree angle.
- 0:03 Press down very slightly on the brush and then release some of the pressure.
- 0:06 Rotate the brush slightly in a clockwise manner so the thick part of the curve of the brush is facing towards the bottom of the page and slightly to the right.
- 0:10 The line is finished by bringing the brush up and off the paper.
- 0:17 The corner is fine even though it is a little more rounded than one would like.
- 0:23 The horizontal line should be angled slightly upward.
- 0:26 The second yokoga should also be angled slightly upward.
- 0:30 The final yokoga is fine.
3. End of Section 2: kaisho 2
This lesson finishes the second section. Having practiced 3-4 one hour sessions per week it should have taken about three months to master these six lessons. These basics are extremely important.
The emphasis at this point is still getting the lines right and getting comfortable drawing these lines consistently so that they feel natural.
In the next section we are going to continue practicing these basic lines and strokes. One should not be overly concerned with form at this point but rather should focus on the lines and strokes themselves.
For more about the lessons see Takase Shodokai - Learn Japanese Calligraphy
Vocabulary
| Romaji | Kana | Kanji | English | Audio |
|---|---|---|---|---|
| me | め | 目 | Eye | audio |
| tatega | たてが | 縦画 | Vertical Stroke | audio |
| tensetsu | てんせつ | 転折 | Continued Lines | audio |
| yokoga | よこが | 横画 | Horizontal Line | audio |