
Lesson 8
月 tsuki · Moon
1. The character
In this lesson we are going to brush tsuki 月 which means "moon". We will work particularly on the tensetsu on the right that ends with a hane stroke. Remember that the corner is three separate lines which are a horizontal component, a small 45 degree line and a vertical component. The ending of the tensetsu is again a slight 45 degree angle line and then a hane stroke.
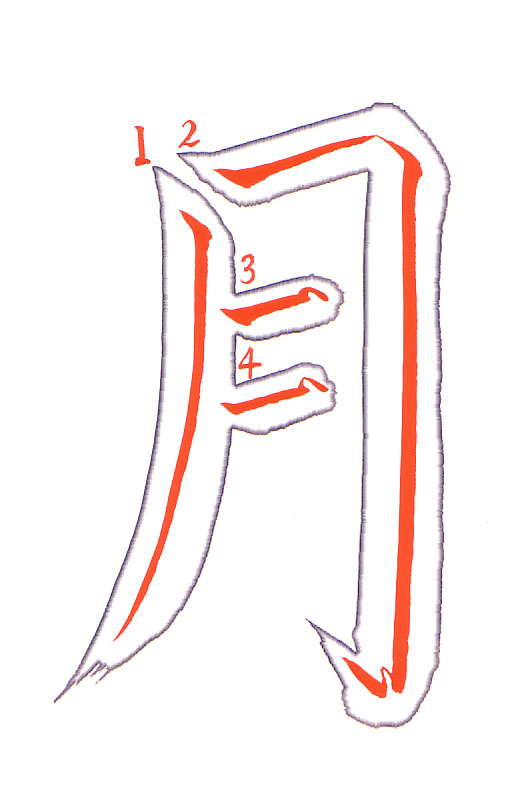
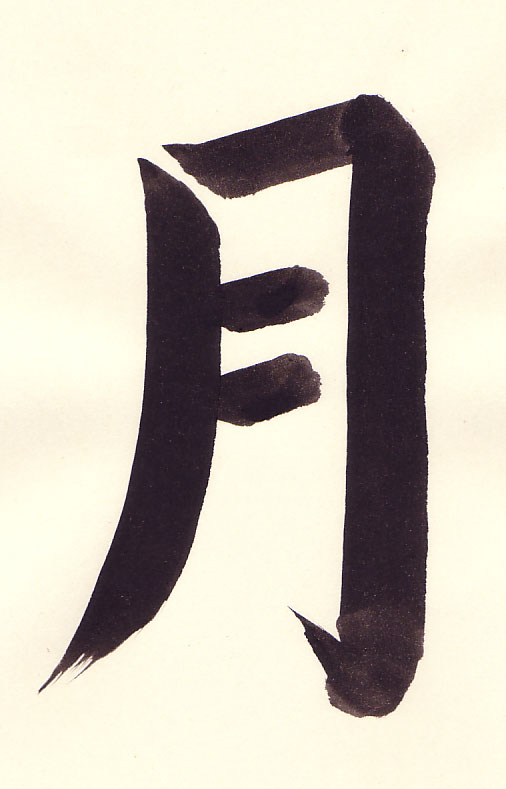
- 0:08 Position the brush to the left of center. Apply the brush at a 45 degree angle.
- 0:08 Press down, pause and then rotate the brush so the thick part of the brush is facing towards the bottom of the page.
- 0:09 The hand and brush position is now set to draw the rest of the hidaribarai.
- 0:09 Note that the arm is being used to pull the stroke.
- 0:10 The hand position is not changing, rather the entire arm is being used to draw the line.
- 0:10 There is a curving that increases slightly towards the bottom of the line. This is still being drawn with the arm.
- 0:11 The brush is brought up and off the paper in a large, deliberate movement.
- 0:15 Start the tensetsu by applying the brush at a 45 degree angle.
- 0:15 Press down on the brush and release.
- 0:16 Rotate the hand so the thick part of the brush is facing to the right and slightly upward.
- 0:16 Keep even pressure on the brush which will give a nice even thickness to the line.
- 0:17 Pause briefly at the end of the horizontal component.
- 0:17 The brush is then repositioned and a very short 45 degree angle line that is down and to the right is drawn. This will give a nice clean corner.
- 0:18 The brush is repositioned again by rotating it clockwise so the thick part of the brush is facing down towards the bottom of the page.
- 0:20 Using the arm draw the line with even pressure on the brush.
- 0:20 Pause slightly at the bottom of the stroke.
- 0:21 Reposition the brush so the thick part is to the lower left and draw a very small line at this 45 degree angle.
- 0:22 The brush is once again rotated so that the thick part of the brush is to the upper left. Now we begin the hane stroke which is a quick and large stroke.
- 0:23 The arm movement may seem exaggerated, but this is needed to give a good form to the hane stroke.
- 0:25 The positions of the yokoga are not evenly spaced. Position the brush in the middle of the hidaribarai at a 45 degree angle.
- 0:26 The hand is repositioned to bring the thick part of the brush to the right.
- 0:27 At the end of the stroke the brush is brought off the page and to the left.
- 0:28 The movement is large and deliberate.
- 0:30 The second yokoga is drawn closer to the previous line than the previous line was to the top line.
- 0:31 Finishing off the second yokoga. Note that it does not touch the horizontal component of the tensetsu on the right.
- 0:37 The final work is nicely balanced.
2. How students did
A student’s 月
The student’s video, without corrections
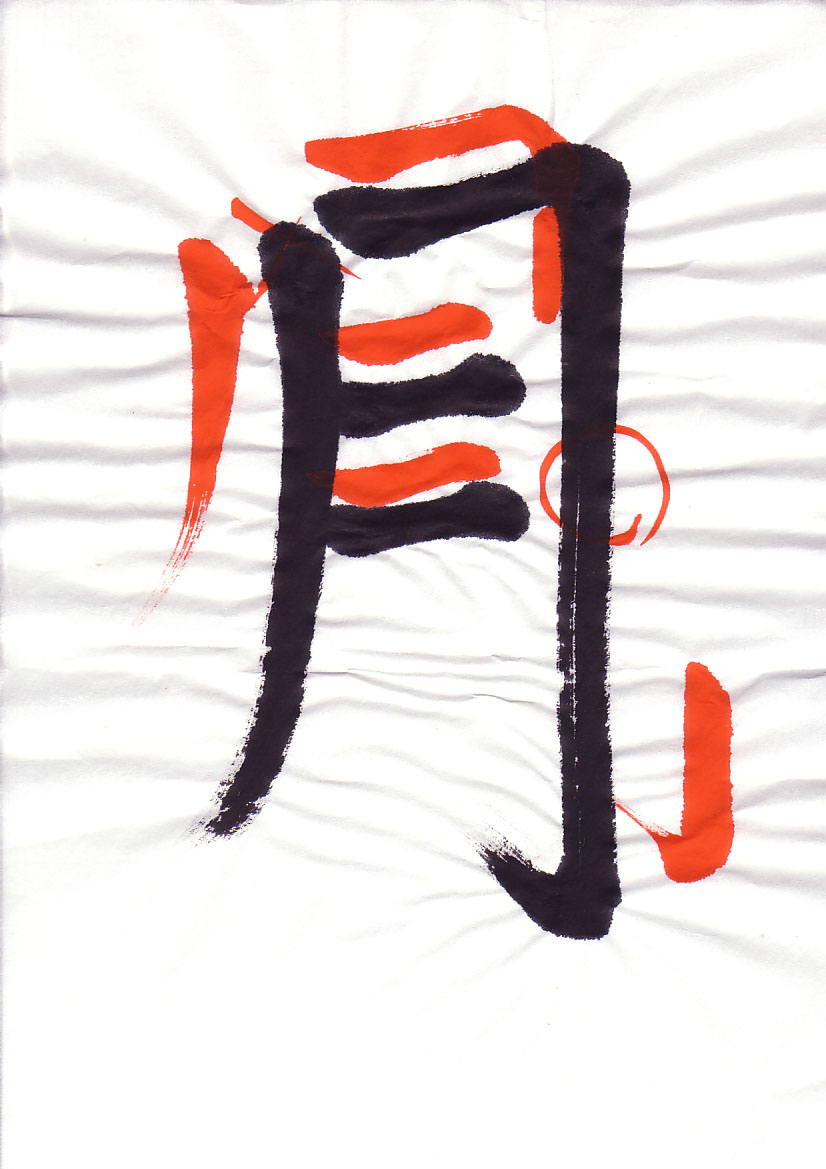
- 0:04 The entry of the hidaribarai is not correct.
- 0:06 Apply the brush to the paper at a 45 degree angle.
- 0:07 The brush is rotated so the thick part of the brush is facing downward in the direction of the stroke.
- 0:10 Once the brush is properly positioned the line is drawn using the entire arm.
- 0:14 Start the tensetsu by applying the brush at a 45 degree angle.
- 0:16 The horizontal component of the tensetsu has a slight upward angle.
- 0:17 At the end of the horizontal component, a slight 45 degree angle line going down and to the right is drawn.
- 0:19 After drawing the slight 45 degree angle line, reposition the brush so the thick part of the brush is facing towards the bottom of the page.
- 0:21 Notice the difference in the corners.
- 0:25 For the yokoga, the tip of the brush starts within the hidaribarai.
- 0:26 Keep even pressure on the brush in order to create a constant line width.
- 0:28 At the end of the horizontal lines the brush is brought a bit up, pressed, then moved down and around to give a nice finish to the line. The student did this but with too much vigor and has circles on the ends of the lines.
- 0:41 The vertical component of the tensetsu is fine up to this point.
- 0:44 Use the entire arm to draw the vertical component of the tensetsu.
- 0:46 At the bottom, rotate the brush clockwise so the thick part of the brush is facing down and to the left.
- 0:46 Draw a very slight 45 degree angle line down and to the left.
- 0:47 The brush is once again rotated so the thick part is facing up and to the left.
- 0:49 The tensetsu is then finished with a hane stroke.
Another student’s 月
The student’s video, without corrections
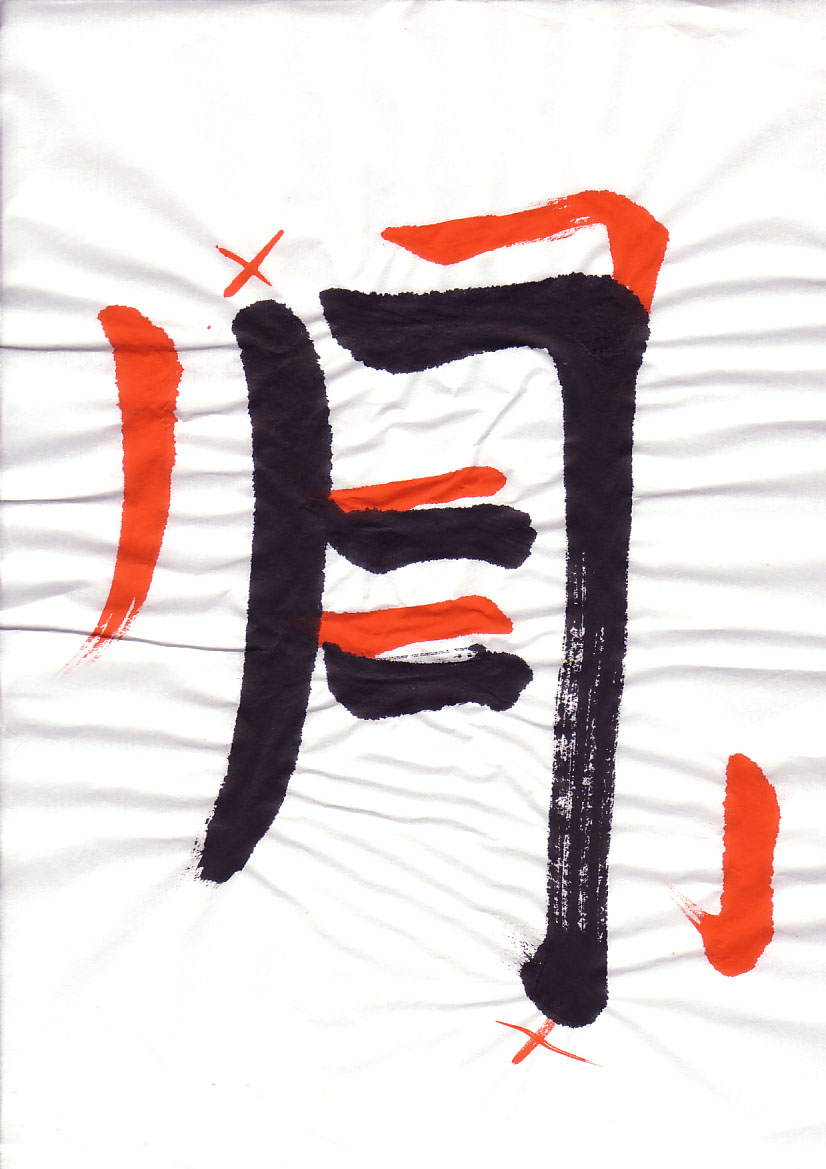
- 0:01 The start of the hidaribarai line is not correct.
- 0:02 Start by applying the brush to the paper at a 45 degree angle.
- 0:03 Reposition the brush so the thick part of the brush is facing towards the bottom of the page.
- 0:04 The line is drawn by pushing the brush - that is the bristles are ahead of the hand as the brush is drawn towards you.
- 0:06 Notice that the hand position has not changed as the whole arm is being used to draw the line.
- 0:11 The start of the tensetsu can be better. Apply the brush at a 45 degree angle.
- 0:12 After pressing down the brush position is changed so the thick part of the brush is towards the right and slightly up towards the top of the page.
- 0:13 The line is drawn using the whole arm and even pressure is applied to the brush to create a line of even thickness.
- 0:15 At the end of the horizontal component a slight 45 degree angle line is drawn for the corner.
- 0:17 The brush is once again repositioned to draw the vertical component.
- 0:25 For the end of the vertical component, there is a slight pause at the end of the line.
- 0:26 The brush is repositioned to draw a small 45 degree angle line that goes down and to the left.
- 0:27 The brush is once again repositioned so the thick part of the brush is facing to the left and up.
- 0:27 The hane is a quick motioned stroke. A large motion is also required in order to get the right form.
- 0:30 Again, the bottom of the tensetsu line is not quite right.
- 0:32 Begin the horizontal line well within the hidaribarai.
- 0:32 Press down to create a nice beginning to the line.
- 0:34 The stroke is finally ended by bringing the brush off the paper and to the left.
- 0:39 Also the position and orientation of these two horizontal lines are not right. They should angle slightly upward.
- 0:44 Here is the final result. Student 2 is having trouble with the basic lines and should go back to lessons 2 and 3. The form of the character is not as important as mastering the basic strokes and lines.
Vocabulary
| Romaji | Kana | Kanji | English | Audio |
|---|---|---|---|---|
| hane | はね | 撥ね | Flick Stroke | audio |
| hidaribarai | ひだりばらい | 左払い | Left Pullout Stroke | audio |
| tategahane | たてがはね | 縦画撥ね | Vertical Stroke with Flick | audio |
| tensetsu | てんせつ | 転折 | Continued Lines | audio |
| tsuki | つき | 月 | Moon | audio |
| yokoga | よこが | 横画 | Horizontal Line | audio |