
Lesson 7
主 shu · Lord
1. The character
In this lesson we are going to focus on the three basic horizontal lines known as yokoga which we first introduced in lesson 2.
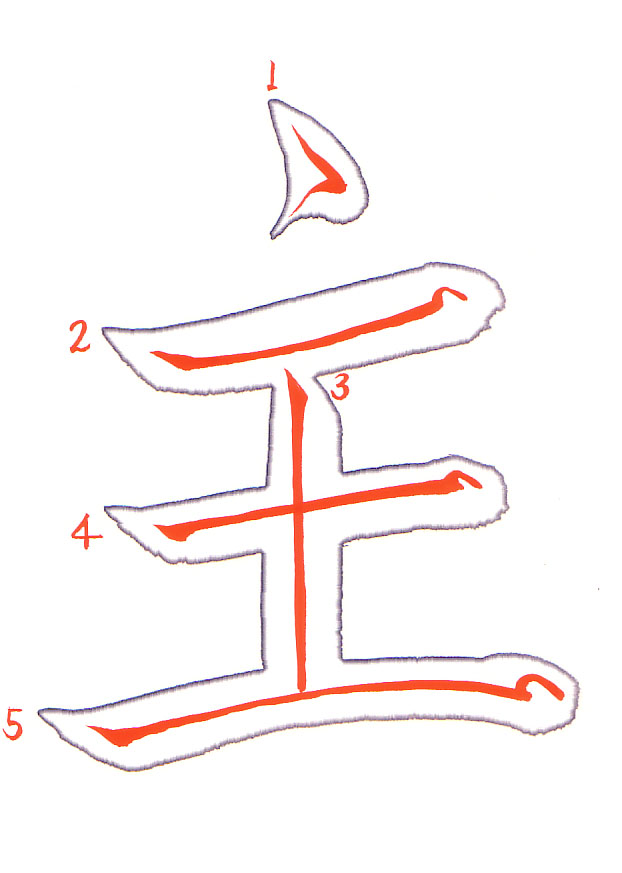
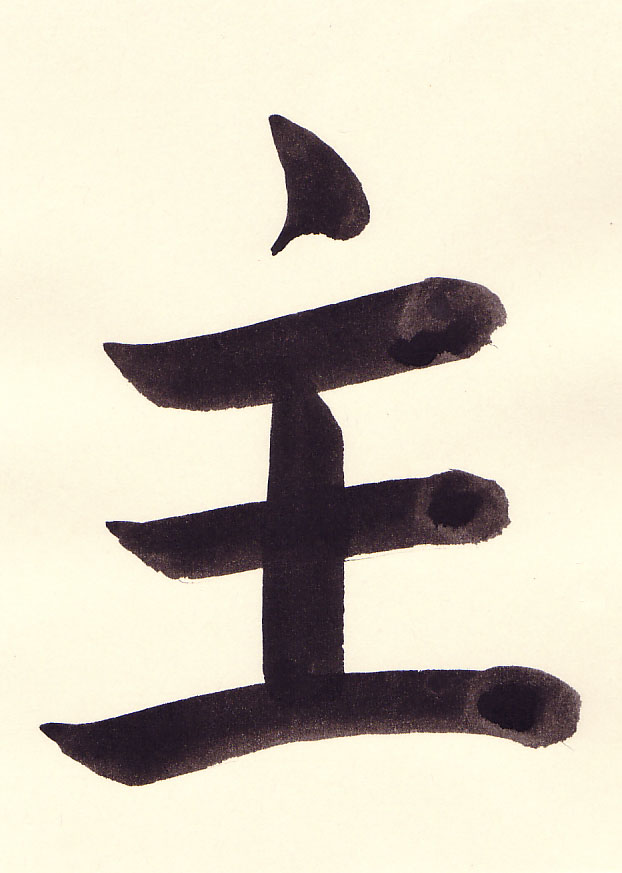
- 0:07 The ten is started in the middle of the page. The brush is applied at a 45 degree angle.
- 0:07 The brush is pressed down towards the paper and moved slightly downward towards the bottom right of the page.
- 0:08 The brush is then repositioned so the thick end of the brush is towards the hane stroke which is to the lower left.
- 0:09 Here the rotation of the brush is completed and the hane stroke has begun.
- 0:09 The hane stroke is a quick and large stroke. The brush is being brought off the paper to give a tail to the ten stroke.
- 0:10 Again this stroke requires a large motion. This is not a timid stroke.
- 0:13 The first yokoga line will be of even length on each side of the ten stroke. Apply the brush at a 45 degree angle.
- 0:14 There is a slight pause once the brush has been applied and pushed down. Then rotate the brush so that the thick part of the brush is to the right and the brush will be pushed.
- 0:16 Note the hand position does not change while drawing this line. Also note the slight upward angle. Be careful as this line is supposed to be straight and not curved upwards.
- 0:16 The brush is then brought slightly up and then down to give a nice ending to the line.
- 0:21 In the middle of the yokoga apply the brush at a 45 degree angle.
- 0:22 Rotate the hand and brush so the thick part of the brush is facing straight downward (toward the bottom of the paper).
- 0:25 At the end of the tatega the brush is brought up and off the page to give a nice crisp ending to the line.
- 0:28 Make the second yokoga slightly shorter than the first. Apply the brush to the paper at a 45 degree angle.
- 0:29 Press down on the brush slightly and release the pressure. Then rotate the hand counterclockwise so the thick part of the brush is to the right and slightly upward.
- 0:32 The end of the line is finished with a slight upward and then downward movement of the brush.
- 0:32 The end of the stroke is finished by bringing the brush up and to the left.
- 0:36 The final yokoga is larger than the other two. The brush is applied again at a 45 degree angle.
- 0:37 The hand is rotated so the thick part of the brush is facing to the right and slightly upward.
- 0:39 Also notice the convex shape of the final line. There is a very slight change in pressure on the brush to give a slightly thinner line towards the middle.
- 0:41 The end stroke is finished with a larger movement.
- 0:44 The end result is nicely balanced.
2. How students did
A student’s 主
The student’s video, without corrections
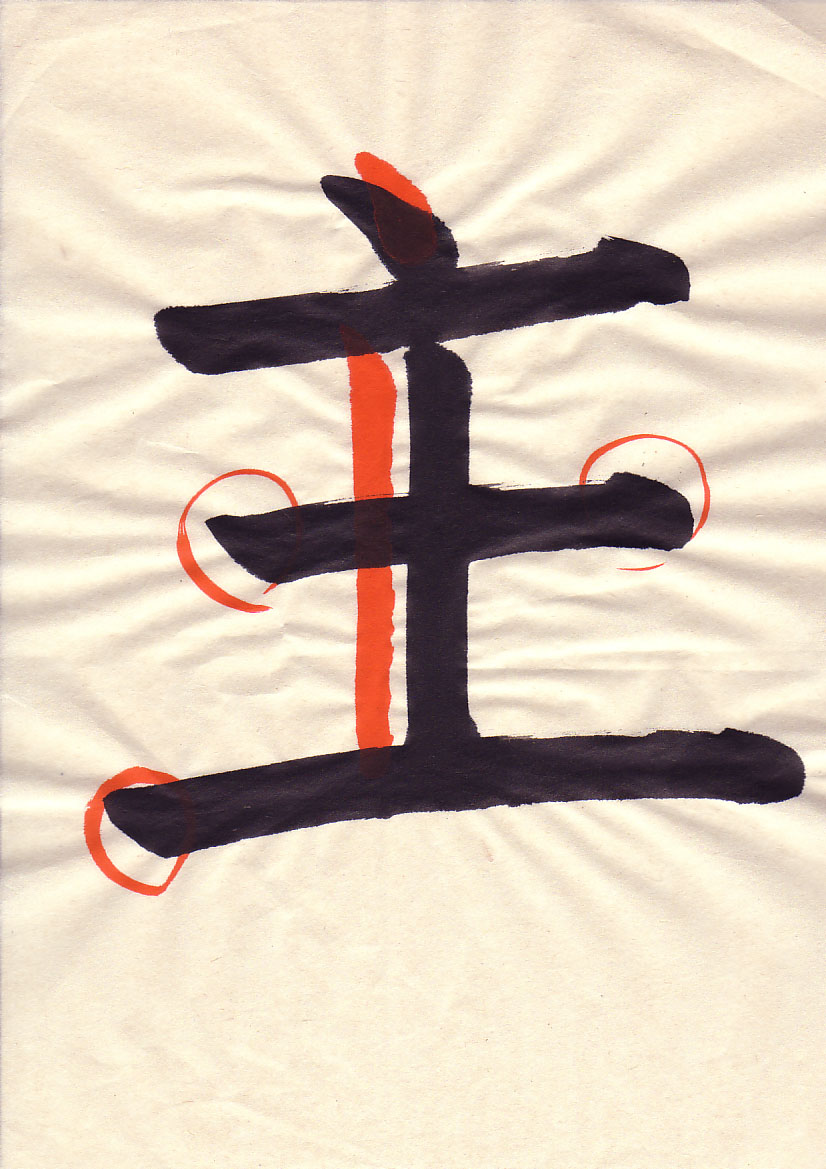
- 0:03 The ten is slanted over too far and is to the left of where it should be with respect to the other lines. Also notice that the student decided not to do the hane stroke which is fine.
- 0:04 After applying the brush at a 45 degree angle, press down on the brush and pause. The brush is then brought straight up and off the paper.
- 0:13 The second line is started nicely.
- 0:14 The ending of the second line also has a nice finish.
- 0:16 The third line starts off adequately.
- 0:18 The position of the tatega is fine. However, it should start in the middle of the first yokoga. Position the tip of the brush in the middle of the horizontal line.
- 0:18 Press down, release, and then position the brush so that the thick part of the brush is facing towards the bottom of the paper.
- 0:19 Use even pressure on the brush and the whole arm to move the brush downward.
- 0:23 Note the hand position has not changed, rather the whole arm is used to move the brush down the page.
- 0:25 The brush is brought up and off the page. Note that the student's line thickens at the bottom. This should not happen. The tatega should have an even width.
Another student’s 主
The student’s video, without corrections
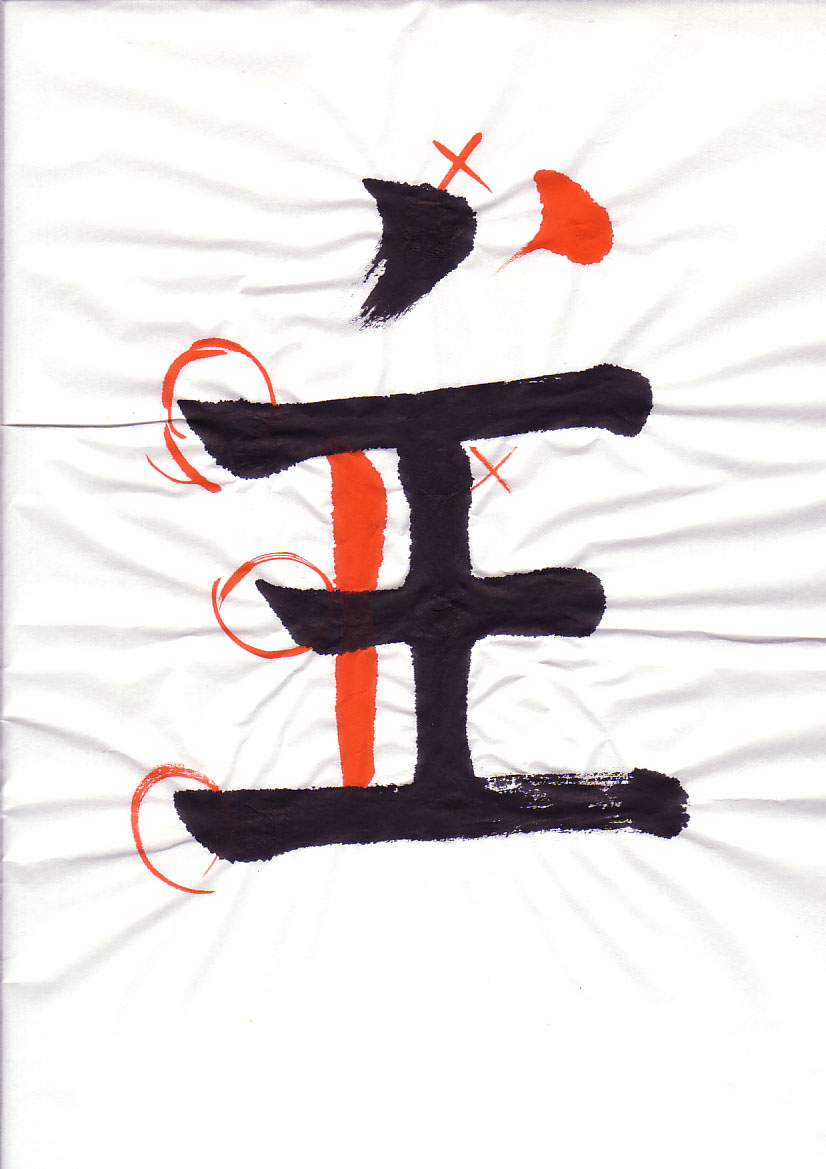
- 0:02 The ten is not right. The side of the brush was used to draw this.
- 0:02 Apply the brush at a 45 degree angle.
- 0:03 Press down on the brush.
- 0:04 Release a little pressure off of the brush. Then reposition the brush so the thick end of the brush is facing towards the lower left of the paper.
- 0:05 Now that the brush is in position it is going to be brought up and off of the paper in a quick motion.
- 0:06 The stroke is quick and large.
- 0:10 The starts of the yokoga are fine. The variable thickness is caused by uneven pressure on the brush.
- 0:17 The start of the tatega is in the middle of the first yokoga and the top of the student's tatega bulges which is not a nice effect. Apply the brush at a 45 degree angle.
- 0:21 Press down, release, and then rotate the brush so that the thick part of the brush is towards the bottom of the page.
- 0:22 Keep even pressure on the brush and bring the arm straight down.
- 0:24 Note that the angle of the brush and the hand position have not changed. The arm is being brought straight down.
- 0:26 The finish of the tatega is up and off of the paper.
- 0:31 The start of the third line is fine.
- 0:32 The endings of the horizontal lines are going to need some work. This student should go back to lesson 2 and carefully practice the horizontal lines.
Vocabulary
| Romaji | Kana | Kanji | English | Audio |
|---|---|---|---|---|
| shu | しゅ | 主 | Lord | audio |
| tatega | たてが | 縦画 | Vertical Stroke | audio |
| ten | てん | 点 | Dot Stroke | audio |
| yokoga | よこが | 横画 | Horizontal Line | audio |