
Lesson 11
友 tomo · Friend
1. The character
tomo 友 gives us the opportunity to practice harai strokes. There are three in this one simple character with two hidaribarai and one migibarai.
tomo 友 means friend and has two readings which are tomo and yū. This character is used in tomodachi 友達 and in yūjin 友人 which both mean friend. In common Japanese, though, one uses tomodachi to mean friend.
tomo (Friend) 友 — sensei video
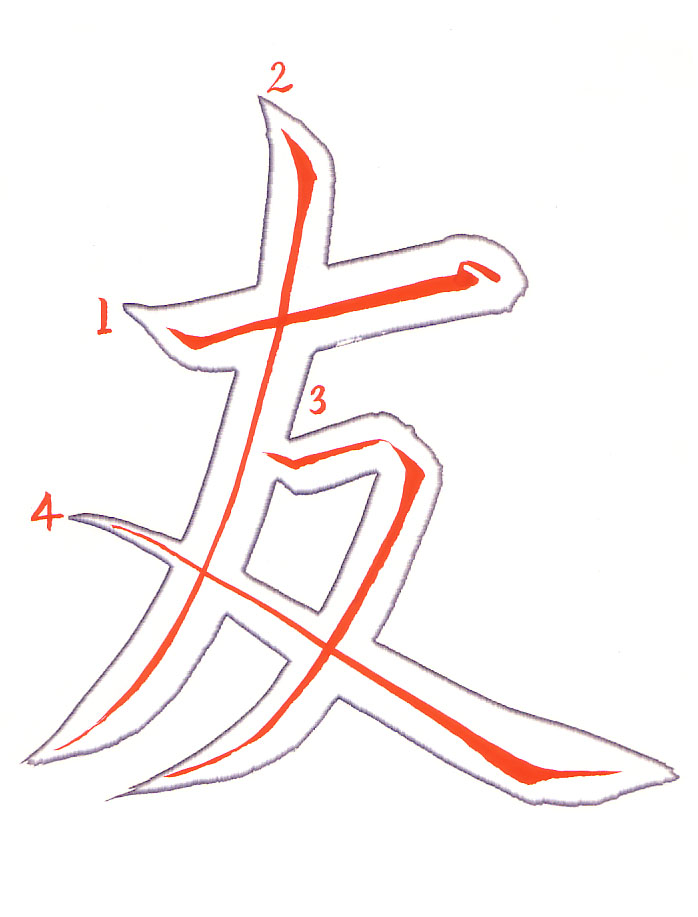
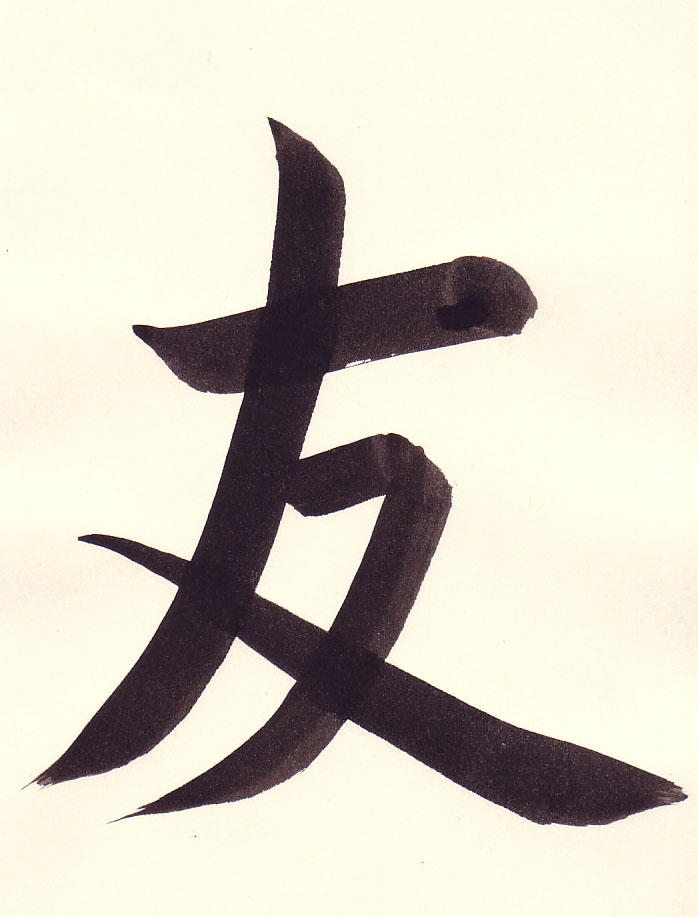
- 0:03 Begin with the yokoga. Apply the brush to the paper at a 45 degree angle.
- 0:03 Press down slightly on the brush and release this pressure.
- 0:04 The brush is then rotated counterclockwise so that the thick end of the brush is in the direction of the line which is to the right and angled slightly upward.
- 0:05 Consistent downward pressure on the brush is critical to give the line a consistent width. This is done by using the arm to draw the line.
- 0:08 To end the stroke the brush is lifted upward (towards the top of the paper) and pressure is slightly released. Then the brush is moved to a 45 degree angle and stopped.
- 0:11 For the hidaribarai, apply the brush to the paper at a 45 degree angle. Press down gently on the brush and come back up. Then rotate the brush so the thick end of the curve is in the direction of the stroke.
- 0:12 Then using consistent pressure and the entire arm to draw the line, bring the brush to the left and down.
- 0:14 Note the hand position does not change and the entire arm is used to draw the line.
- 0:15 As you approach the bottom of the stroke gradually bring the brush off the paper. This is a large and deliberate movement.
- 0:19 Begin the tensetsu by applying the brush at a 45 degree angle.
- 0:20 In the corner the brush is not brought straight down. Rather at the end of the horizontal stroke, create a small 45 degree angle line.
- 0:22 Then reposition the brush by rotating it clockwise.
- 0:23 Finish off the line with a hidaribarai. Note that the entire arm is used to draw the line.
- 0:24 Here the brush is rotated to get the small part of the tip in place to create a nice taper to the end of the line.
- 0:24 As you approach the bottom of the stroke gradually bring the brush off the paper. This is a large and deliberate movement.
- 0:31 Begin the migibarai to the left of the first hidaribarai by applying the brush at a 45 degree angle.
- 0:32 Gradually apply pressure to the brush in a stroke that uses the entire arm to draw.
- 0:33 At the end of the stroke, the brush is repositioned so that the thick part of the curve of the brush is facing to the right.
- 0:34 The brush is also tilted to the left to get good contact with the thickest part of the brush against the paper.
- 0:34 Pull the brush slowly to the right to give a nice triangular shape to the end of the stroke.
2. How students did
A student’s 友
The student’s video, without corrections
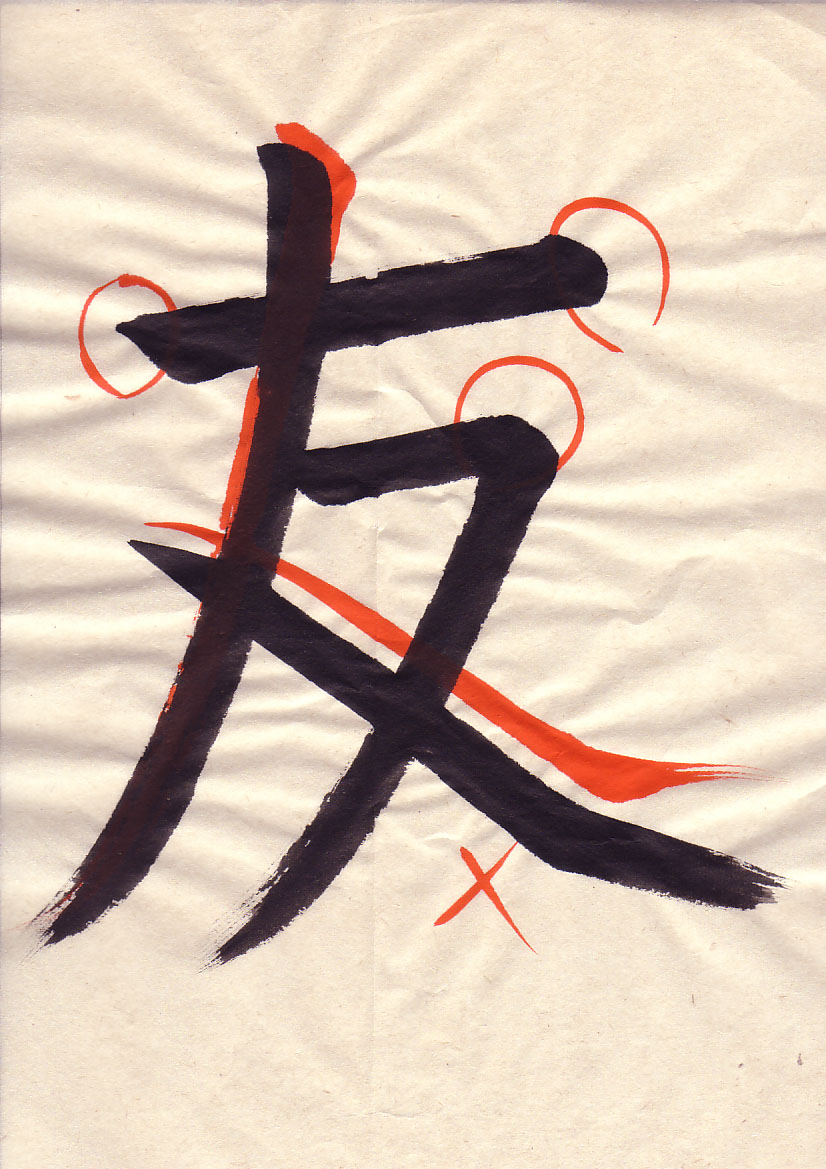
- 0:04 In general the lines on this student sample look good.
- 0:06 The hidaribarai needs a cleaner definition on the start of the line. Also the top part of the line comes straight down. The hidaribarai should be a nice smooth curve.
- 0:07 A brief pressing down on the brush will give a good form and definition to the start of the stroke.
- 0:09 The hand position is kept the same throughout the stroke using the arm to draw the line.
- 0:10 Gradually the brush is brought off the page to give a nice crisp taper to the end of the line.
- 0:11 The large motion is important to getting the right look to the line.
- 0:16 The corner here has a nice appearance.
- 0:17 For the migibarai, the student ran right through to end the line. This is not correct, there should be a pause as the brush is readjusted.
- 0:21 Begin the migibarai with the brush at a 45 degree angle and gradually increase the line width by applying pressure to the brush.
- 0:22 At the bottom of the line pause and readjust the brush so the thick part of the brush is now facing to the right.
- 0:23 Note the tilt of the brush to get maximum contact with the thickest part of the brush to the paper.
- 0:25 And in a deliberate stroke bring the brush to the right and off the paper giving a nice triangular ending to the line.
NOTE: In both student samples there is a kasure effect where it looks like the brush runs out of ink when the line is drawn quickly. While this can be a nice effect under the right circumstances, here it is completely out of place. We want to have crisp and precise lines including nicely tapered endings to the lines.
Another student’s 友
The student’s video, without corrections
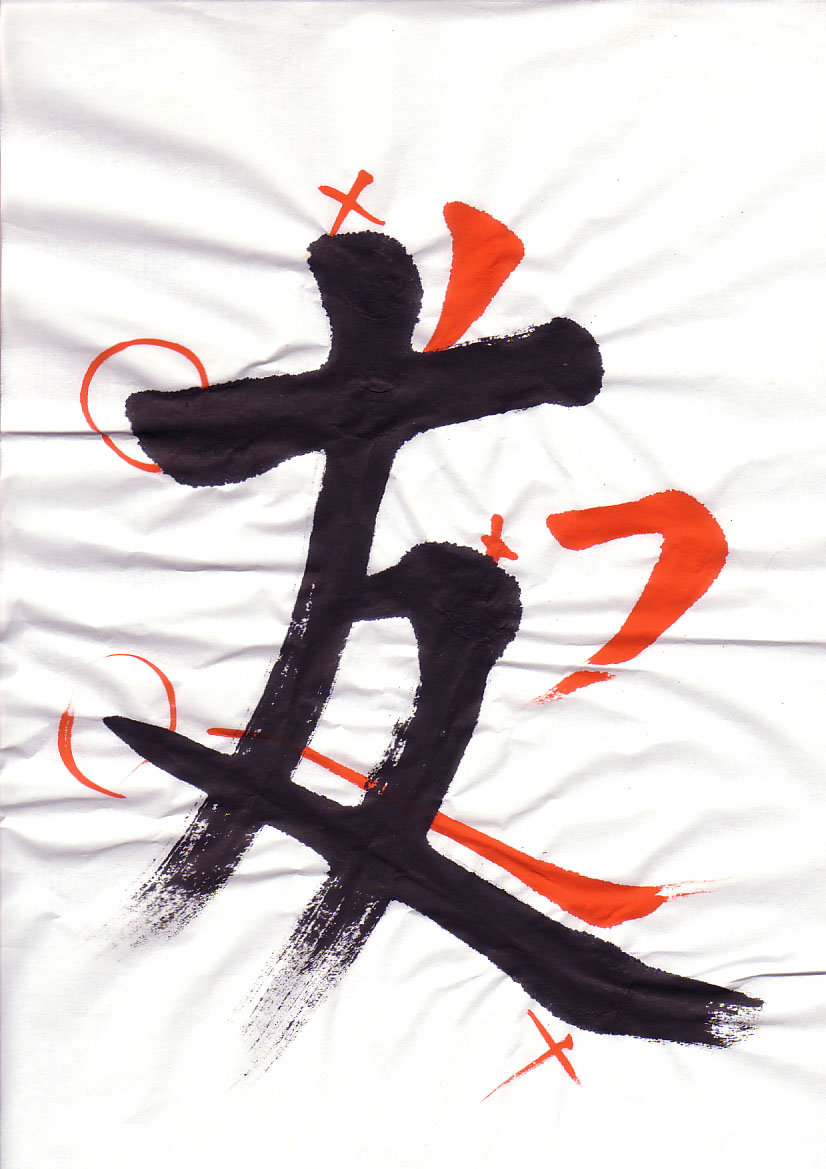
- 0:02 The yokoga starts acceptably well.
- 0:05 The start of the hidaribarai on the other hand is blockish as the brush was not applied to the paper correctly.
- 0:07 Apply the brush to the paper at a 45 degree angle.
- 0:09 Press down very gently and slightly on the brush and come back up.
- 0:10 Rotate the brush so the thick end of the curve is in the direction of the stroke which is down and to the left.
- 0:14 Then using consistent pressure and using the entire arm to draw the line, bring the brush to the left and down in a nice smooth arc.
- 0:16 For the migibarai, the student ran right through to end the line. This is not correct, there should be a pause as the brush is readjusted.
- 0:19 Begin the migibarai by applying the brush to the paper at a 45 degree angle and gradually increase the line width by applying pressure to the brush.
- 0:20 At the bottom of the line pause and readjust the brush so the thick part of the brush is now facing to the right.
- 0:21 Note the tilt of the brush to get maximum contact with the thickest part of the brush to the paper.
- 0:24 And in a deliberate stroke bring the brush to the right and off the paper giving a nice triangular ending to the line.
- 0:28 The paper that this student is using is like blotting paper and is very hard to use. The student paused too much in the corner causing this rounded effect.
- 0:31 At the end of the horizontal component, pause briefly to reposition the brush to face down and to the left.
- 0:31 Draw a very small 45 degree angle line.
- 0:33 Then proceed with the downward stroke which is down and to the left.
- 0:35 The kasure effect on this work is out of place. The line endings should be crisp and nicely tapered.
Vocabulary
| Romaji | Kana | Kanji | English | Audio |
|---|---|---|---|---|
| harai | はらい | 払い | Pullout Stroke | audio |
| hidaribarai | ひだりばらい | 左払い | Left Pullout Stroke | audio |
| migibarai | みぎばらい | 右払い | Right Pullout Stroke | audio |
| tensetsu | てんせつ | 転折 | Continued Lines | audio |
| tomo | とも | 友 | Friend | audio |